
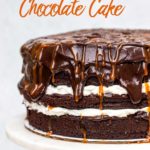
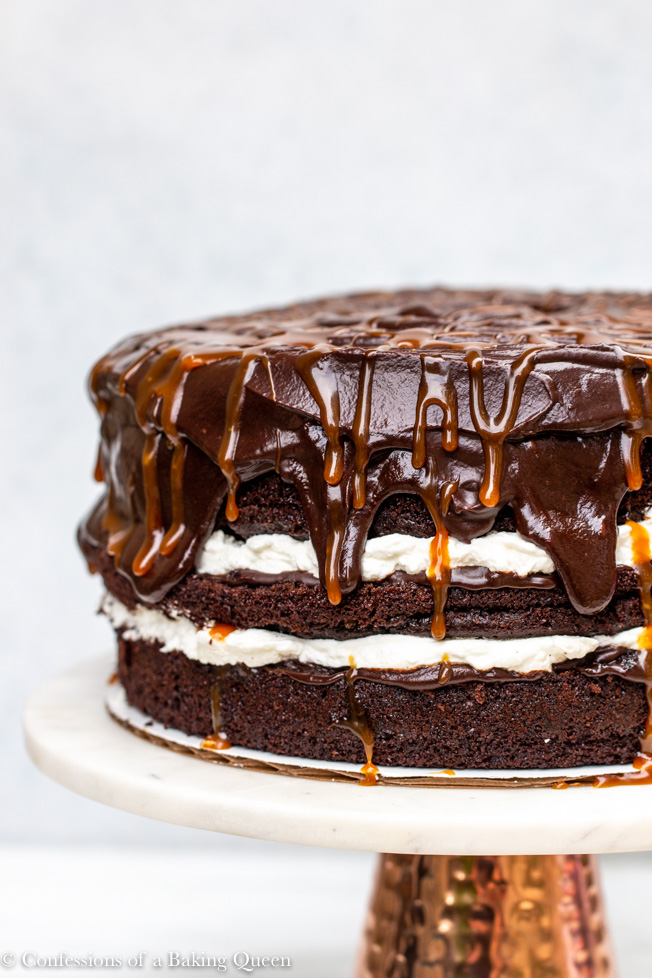
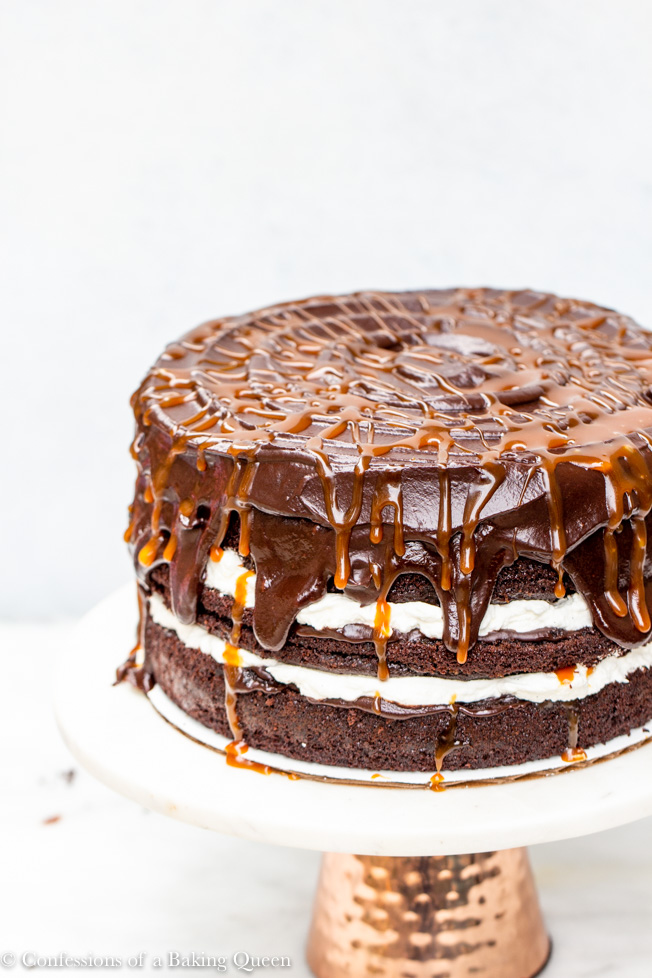
Moist Chocolate Cake filled with homemade salted caramel, mini chocolate chips, fresh whipped cream and chocolate ganache. This cake is easy to put together and you can make some of it the day before! This Easy Salted Caramel Chocolate Cake recipe is the perfect birthday or party cake
Within any part of life, you get in ruts and lack motivation. I was feeling like that when I started making this cake almost five years ago. Originally published on July 23, 2013. Little did I know that this would be the cake most often made for my family and friends. I wrote in my original post "This cake will be made over and over again in my house. I hope you enjoy it as well." and I wasn't lying!!

It makes sense really, chocolate cake + fresh whipped cream + salted caramel + chocolate ganache = H-E-A-V-E-N!
Chocolate Cake with Salted Caramel
As soon as I tasted this cake I knew I needed to get back into the groove of things and bake again. This chocolate and salted caramel cake recipe is moist and fluffy, the salted caramel and fresh whipped cream and thick chocolate ganache, all my favorite things in one dessert.
Easy Salted Caramel Chocolate Cake
This recipe is easy if you plan ahead. Although I have made this in an afternoon, took a few hours, but it can be done!
I would recommend making your cake layers the day before and your homemade salted caramel sauce the day before as well, if not a few days. Next time try baking a salted caramel cheesecake.
Then the day of you just needs to make your whipped cream and chocolate ganache. Then assemble. When making a layer cake I find it easiest to use a cake turntable. The one I have has a nice heavy base, it is 12 inches wide so perfect for many cakes. It makes all the difference. So does having an angled spatula. You can smooth on the frosting, whipped cream, ganache SOOO much easier. I have both a 9 and 13 inch but either will work!
Baking is a science and to really achieve the best results I highly recommend investing in a kitchen scale. This OXO Kitchen Scale is the one I use and is also the number one recommended kitchen scale by Cook's Illustrated. Think about it -what one person scoops into a "cup" is completely different from what someone else scoops!
How do you make Chocolate Cake with Salted Caramel?
With any layer cake, there are a few components. At first, it might seem hard but this is a cake I am confident many beginners can tackle.

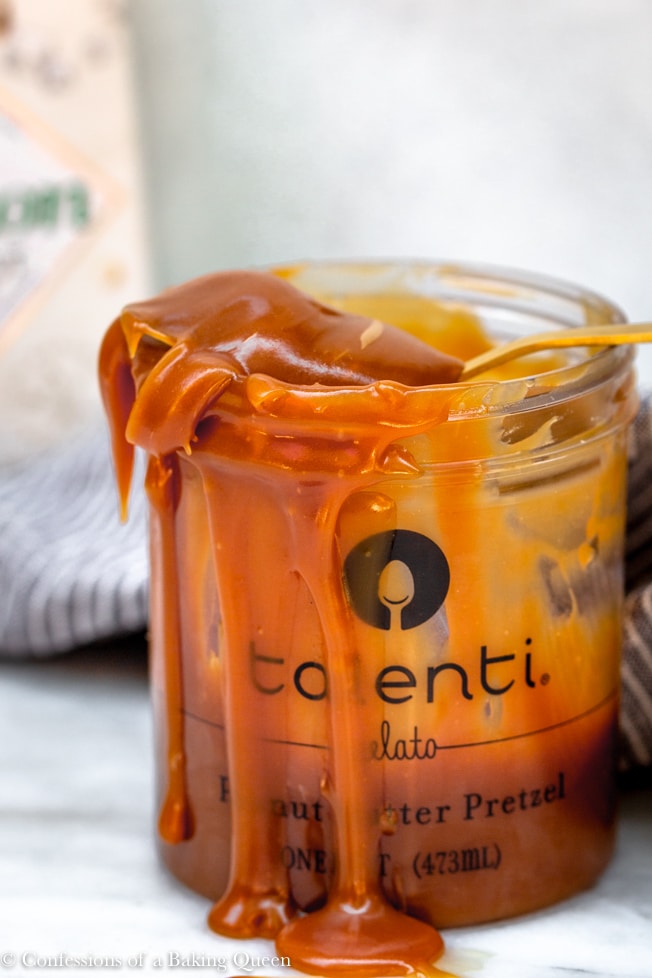
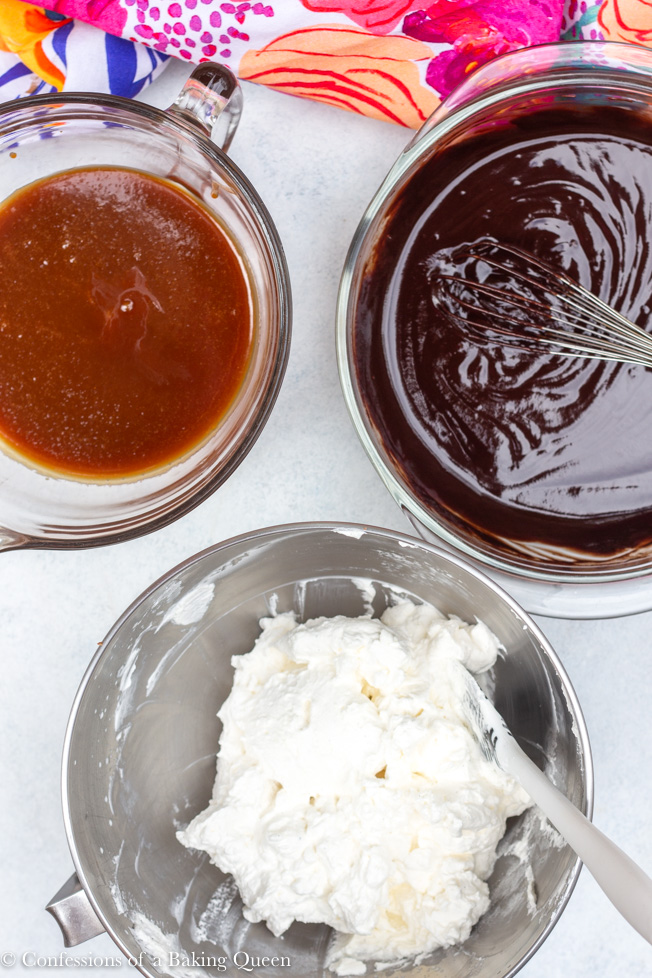
Start with your salted caramel sauce. I love making it homemade, here is a step by step tutorial. But feel free to use storebought as well.
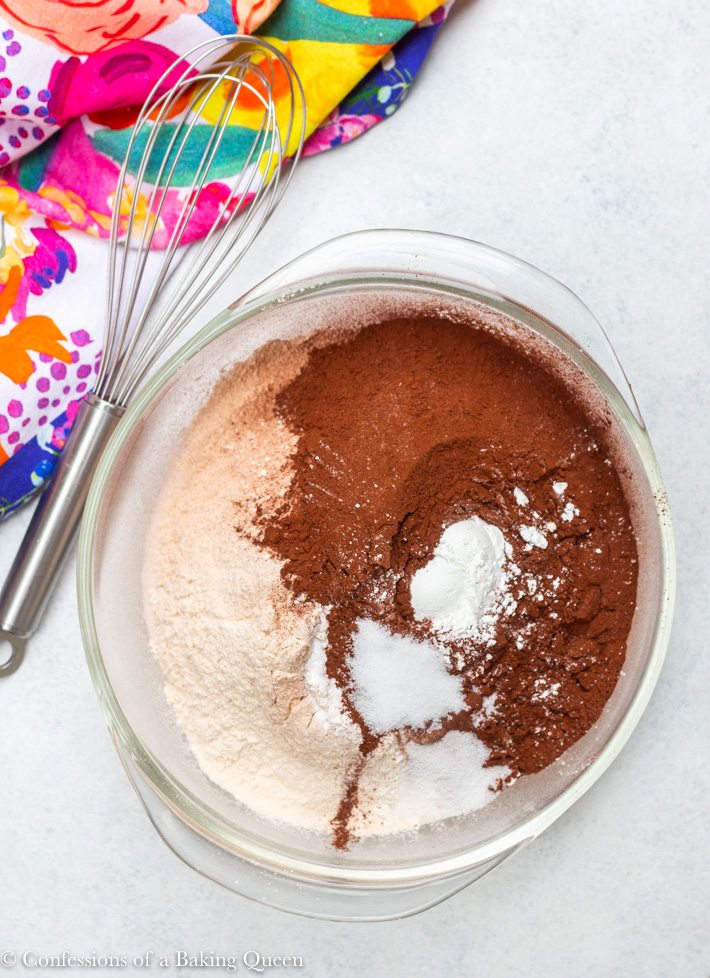
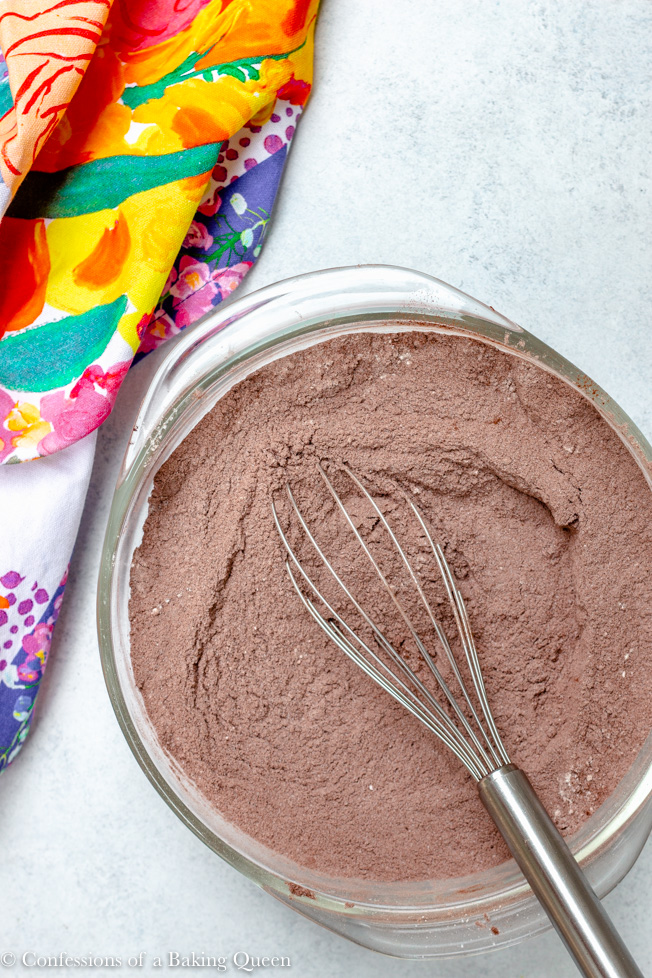
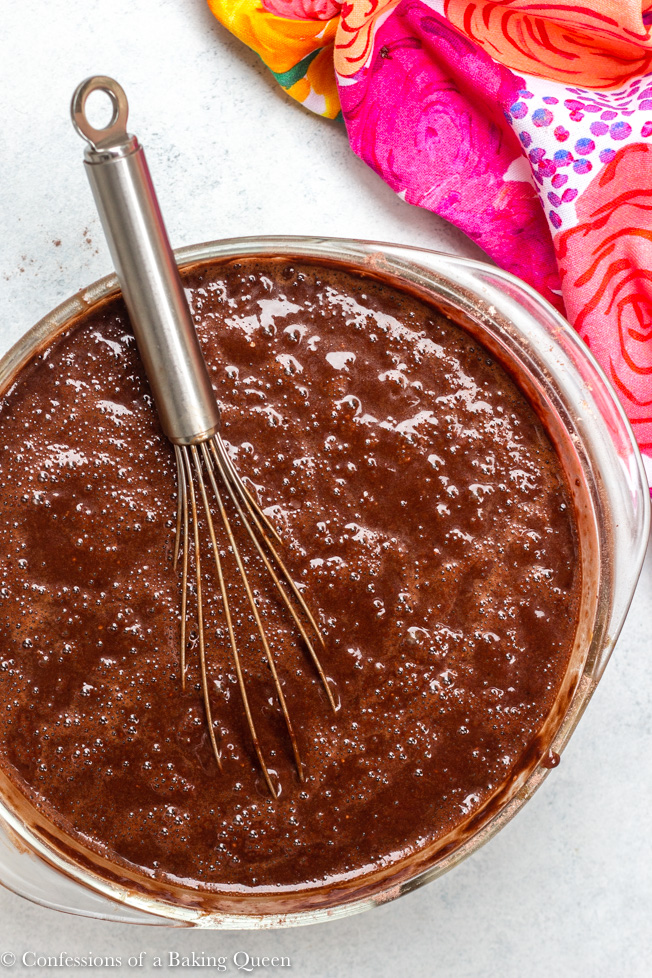
Make your cake layers. You only need two bowls, start with the dry ingredients; cocoa powder, all-purpose flour, baking soda and powder, salt and sugar. Make sure everything is whisked together evenly. No white or dark bits at the bottom, cocoa powder needs to be fully incorporated!
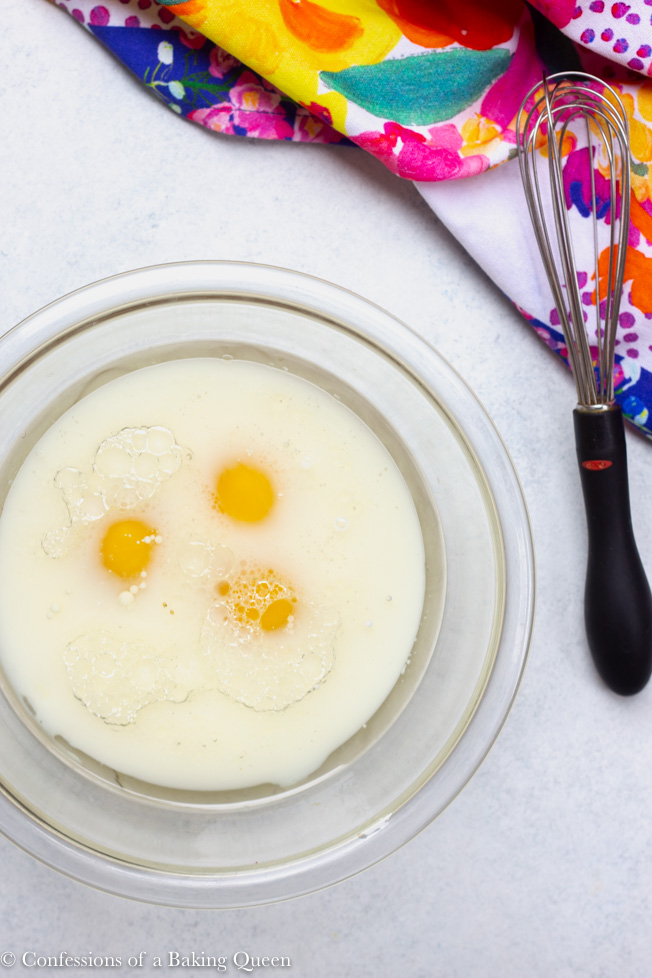
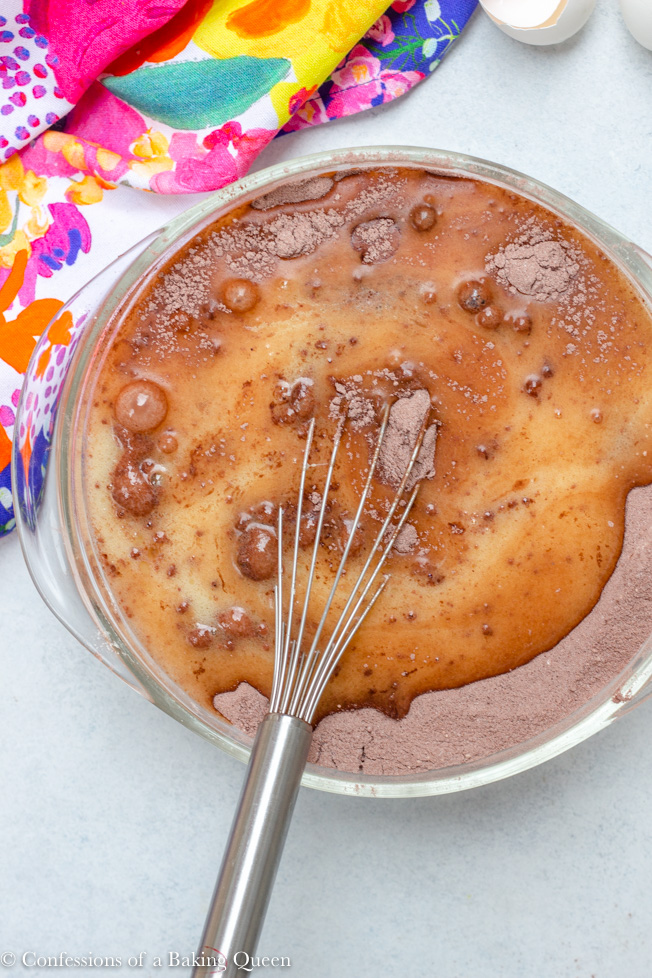
Then in a separate bowl mixture add your eggs, vanilla extract, vegetable oil and buttermilk. Add your wet to the dry bowl. The mixture will seem thick, that's fine. Then you will add strong brewed hot coffee, mix slowly so you don't spill. The cake batter will be quite thin, that's what we want.


Pour evenly into your prepared cake pans. I use these Fat Daddios cake pans all the time, I literally have over 20 of them. They are the best-lightweight, even heat, and cool quickly after coming out of the oven.
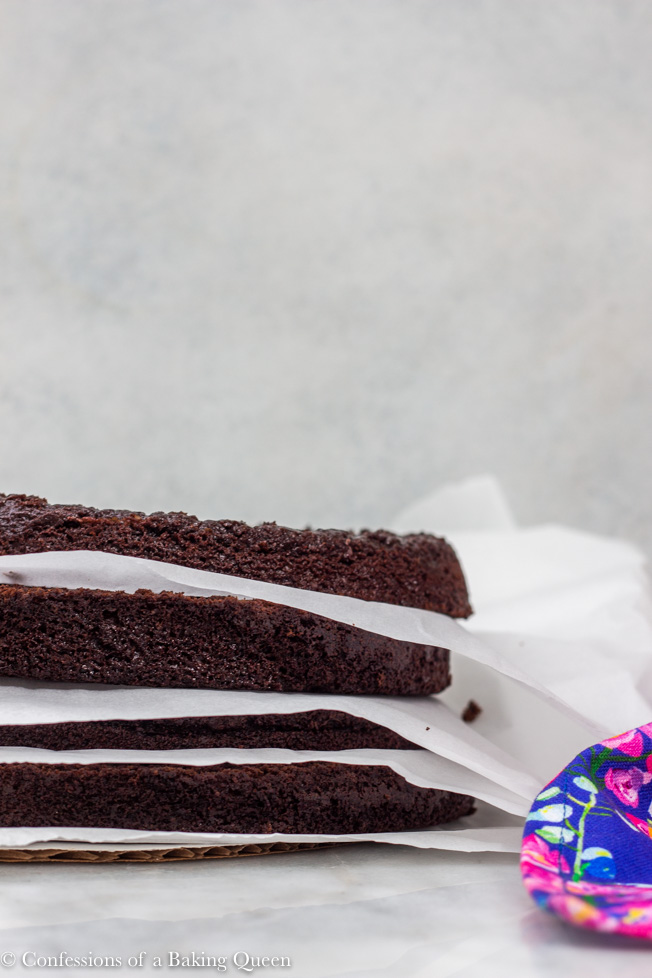
Let the cakes cool in the pan for at least 20 minutes before inverting on to a wire rack- at this point, I take another wire rack to invert the cake back right side up. It's not the end of the world if you don't do it but I usually do.
Let the cakes cool completely and either continue on with cake assembly or wrap layers tightly in plastic wrap for tomorrow. If you want to make the cake layers a few days in advance I recommend brushing a simple syrup on the cake layers before wrapping them in plastic wrap and then freezing until use.
Simple syrup is just equal parts water to granulated sugar let it cook over low-medium heat in a heavy bottomed pan for 10 minutes. This helps keep the moisture in.
How do you assemble this Salted Caramel Chocolate Cake?
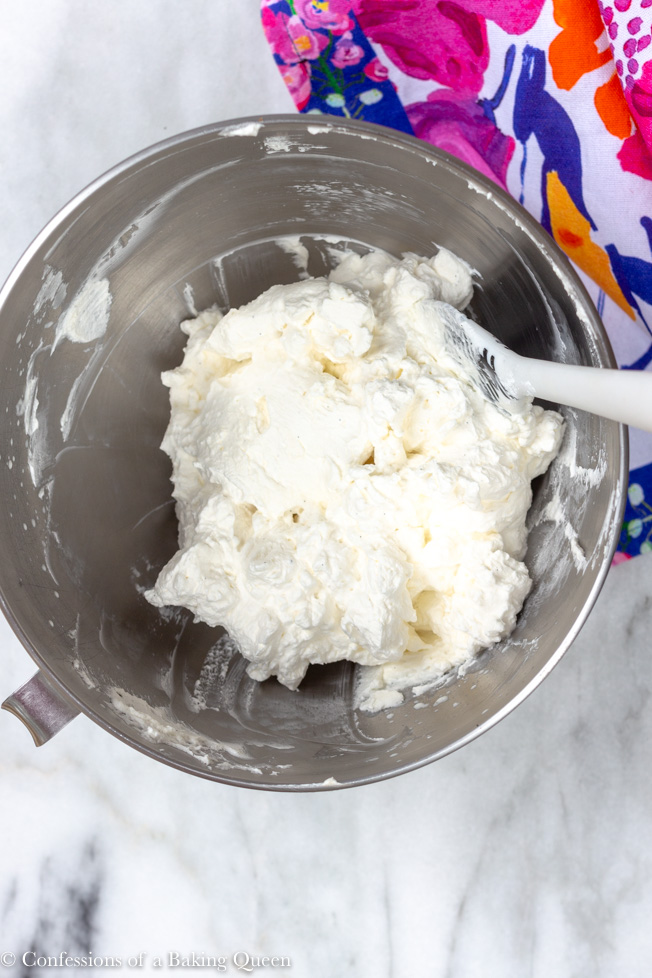
Make your whipped cream. I always place my metal mixing bowl and metal whisk in the freezer or fridge for ten minutes before I start the whipping. Add your whipping cream, powdered sugar and a bit of dry milk powder (this helps stabilize the cream a bit) to your chilled bowl and beat on medium speed for 5 minutes or until stiff peaks form. The slower you beat your cream to whipped cream the more stabilized it will be. Once the cream is whipped set it back in the fridge while you make your ganache. I have a whole post dedicated to making stabilized whipped cream, it only takes 4 ingredients and five minutes.
How do you make Chocolate Ganache?
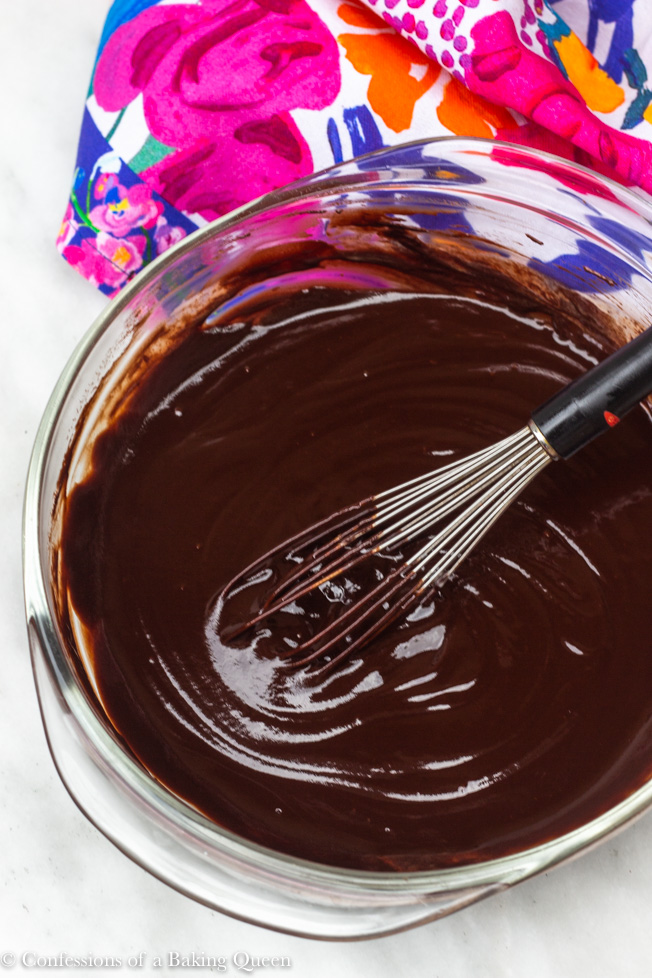
Heat your heavy cream in a microwave-safe bowl or in a small pot over low heat. Heat until warmed up, not boiling. Pour over chopped chocolate or chocolate chips. Let sit for 5 minutes. Then use a whisk and mix together, until you get a smooth glossy texture.

Putting Everything Together
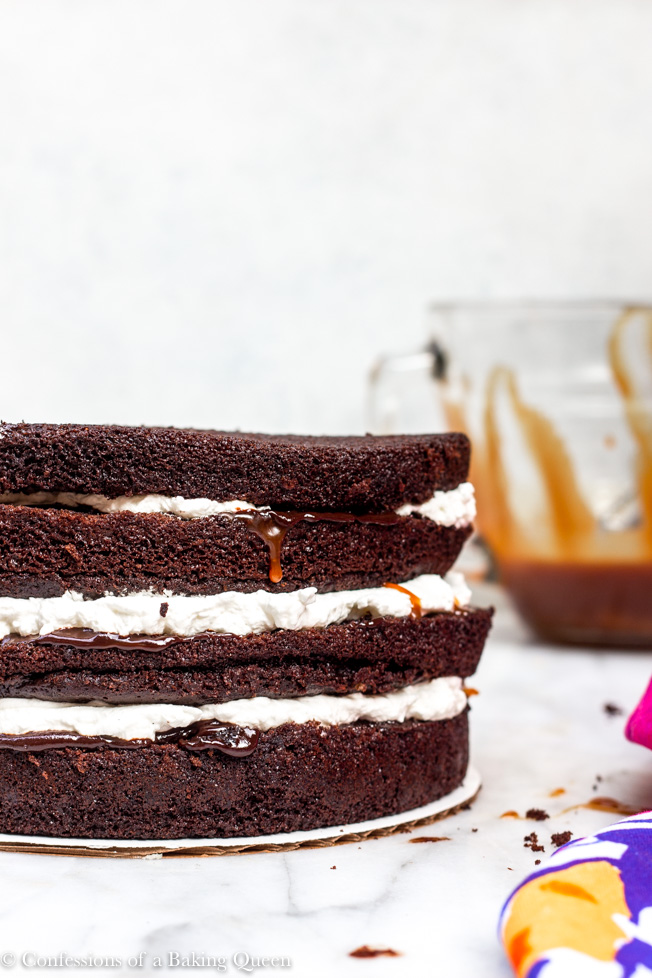
Cut each cake layer in half, to create 4 layers. I use a cake leveler as I am not good at slicing even. But by all means, use a serrated knife to cut the layers as equally as you can.
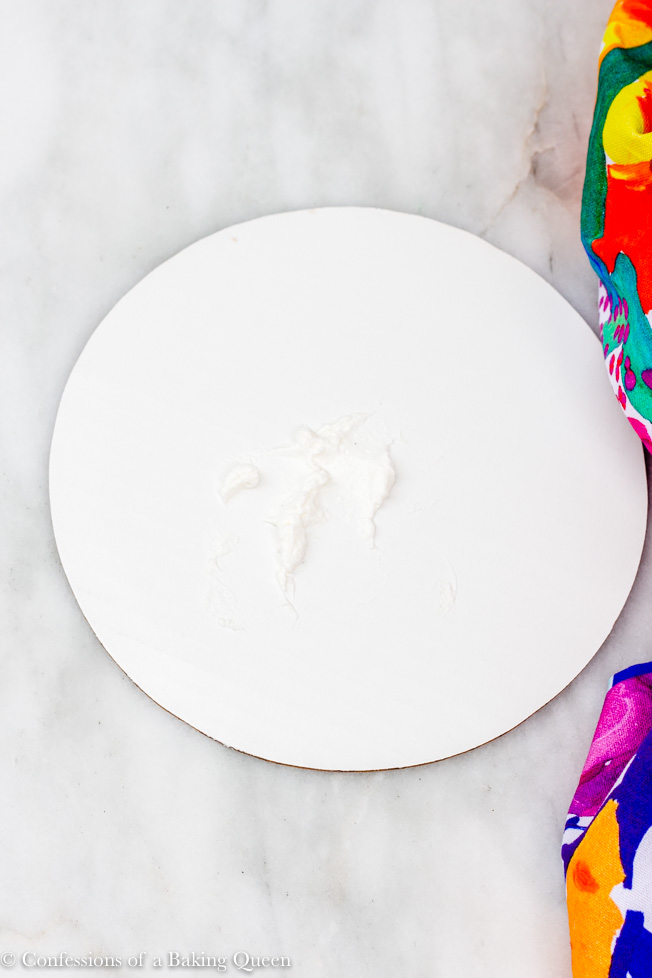
Using your cake turntable if you have one, place a 9-inch cake board down and a bit of salted caramel- this helps the bottom layer of cake stick to the board. Place one layer of chocolate cake then drizzle 3 tablespoon of salted caramel on the cake layer then ⅓ of the whipped cream (making sure to spread it evenly with the help of an angled spatula) and an extra drizzle of salted caramel, repeat until final cake layer is on top.
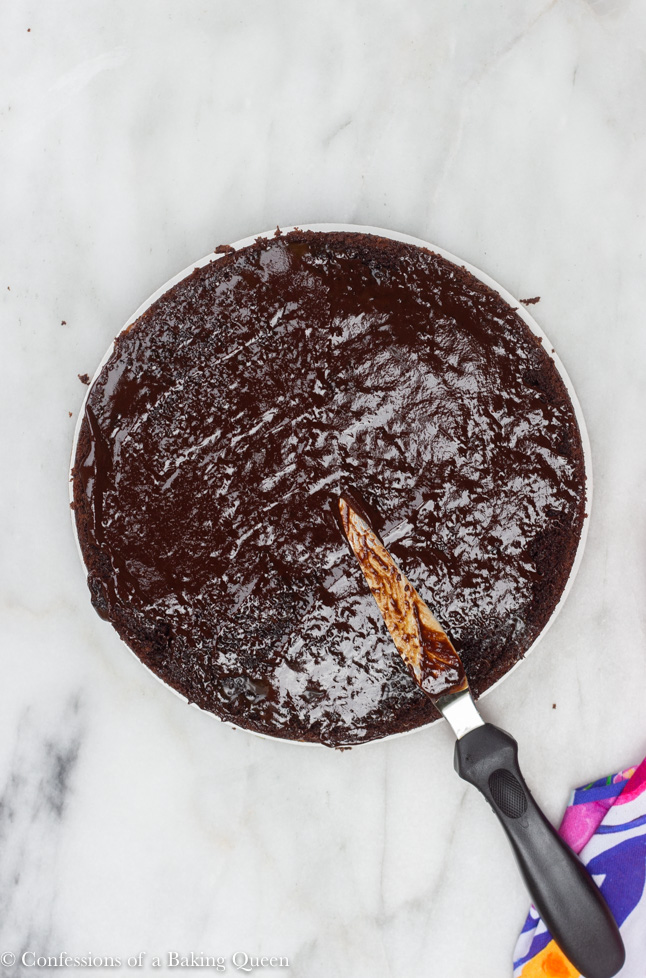
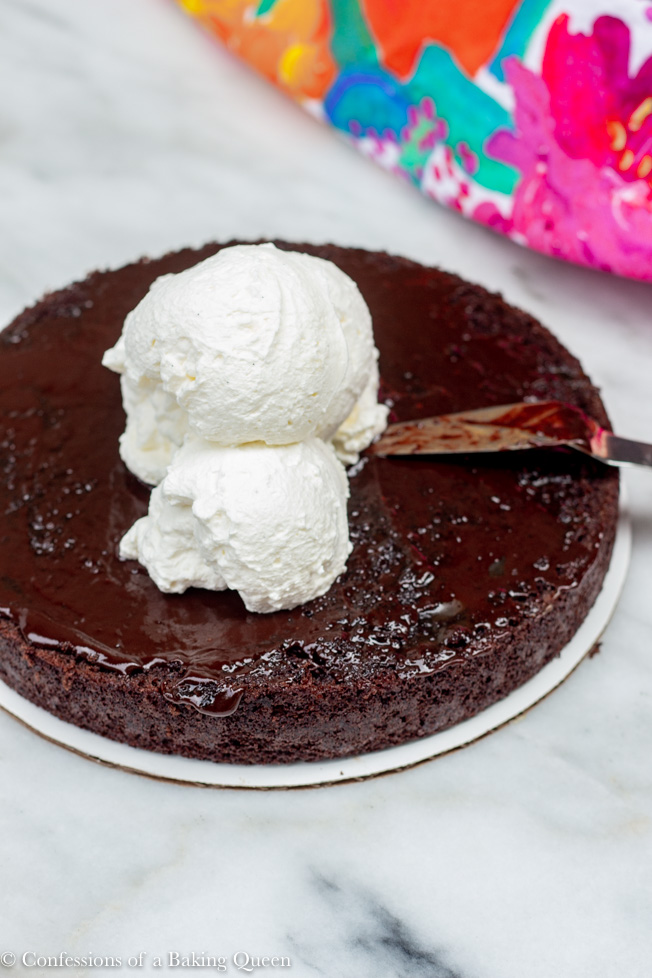
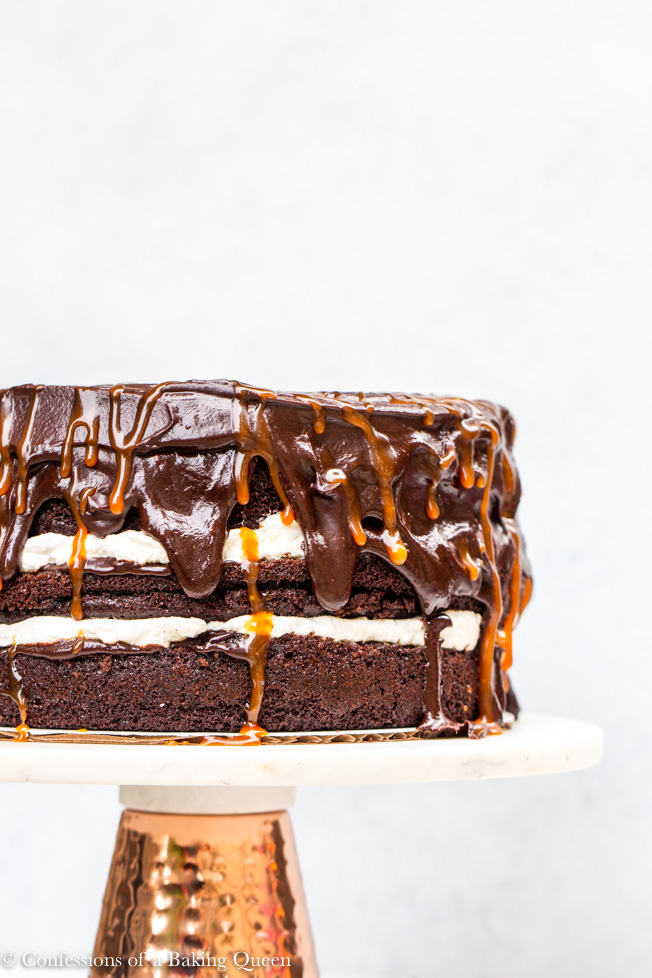
Place chocolate ganache on top of the final cake layer, let it drizzle down the sides of the cake. You can use your angled spatula to help push the ganache a bit further down the sides. If you want more of a specific drip look I suggest putting some of the chocolate ganache in a squeezy bottle and pressing a bit at the edge of the cake to drip down.
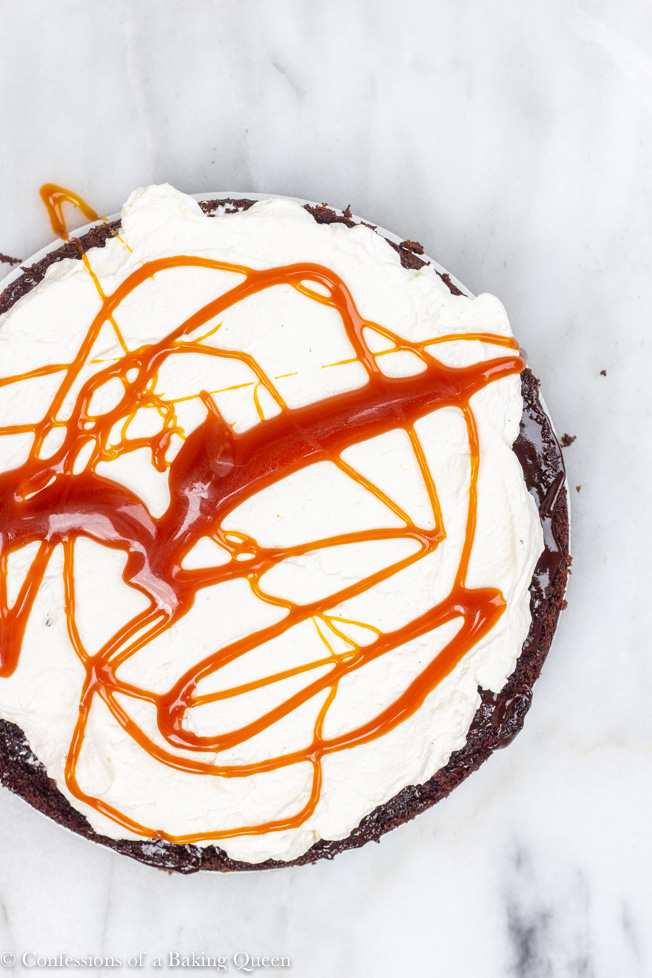
Sprinkle mini chocolate chips and drizzle more salted caramel on top, if desired. Store covered in the fridge. I like to store it in a tall cake carrier to make sure nothing falls on it in the fridge.
If you want an easy sheet cake style cake with similar flavors try my Better Than Sex Cake Recipe or a basic chocolate sheet cake! Or another caramel recipe I love is my salted caramel upside-down apple pie.
★★★★★ Please let me know if you make this recipe by leaving a star rating and comment below!
Make sure to join our Newsletter and follow us on Pinterest, Instagram, Facebook, & Twitter.
PrintRecipe Card

Salted Caramel Chocolate Cake
Moist Chocolate Cake filled with homemade salted caramel, mini chocolate chips, fresh whipped cream and chocolate ganache. This cake is easy to put together and you can make some of it the day before! This Salted Caramel Chocolate cake is the perfect birthday or party cake!
- Total Time: 1 hour 15 minutes
- Yield: 10 pieces 1x
Ingredients
Chocolate Cake
- 400 grams (2 cups) Granulated Sugar
- 250 grams (2 cups) 2 cups all-purpose flour
- 90 grams (¾ cup) Dutch-process Cocoa powder
- 2 tsp Baking Soda
- ½ tsp Salt
- 1 tsp Baking Powder
- 3 Large Eggs, at room temp.
- 2 ½ Teaspoons Vanilla Extract
- 4oz (½ cup) Vegetable Oil
- 8oz (1 cup) Whole Milk or Buttermilk, at room temp.
- 8oz(1 cup) Hot Coffee (I put 1 tbsp of instant coffee and pour hot water on top, let sit for 1 minute)
Salted Caramel
- 8oz (1 Cup) Homemade Recipe or Store Bought
Chocolate Ganache
- 6oz (⅔ cup) Heavy Whipping Cream
- 10oz Semi-Sweet Chocolate Chips
Whipped Cream & Assembly
- 24oz (3 cups) Heavy Whipping Cream
- 3 tbsp powdered sugar
- 1 tsp Dry Milk Powder
- ½ cup mini chocolate chips
Instructions
Chocolate Cake
- Preheat oven to 350F/180C and grease two 9 inch round pans. Set aside.
- In a large bowl sift together the sugar, flour, cocoa powder, baking soda, salt, and baking powder. Mix to combine. Set aside.
- In the bowl of an electric mixer combine eggs, vanilla, oil, and milk mix until fully combined. Slowly add in dry ingredients. Mix until fully incorporated. Add in hot coffee, the mixture will be very thin. Pour evenly into prepared pans.
- Bake for 25-30 minutes. Or until a toothpick inserted comes out clean. Set aside to cool completely, then wrap in plastic wrap and freeze overnight.
Salted Caramel
- While the cake is cooking I make the fresh salted caramel. In a thick bottomed heavy saucepan cook the sugar on low-medium heat. Do not mix the sugar but you can swirl the pan around to mix it that way. The sugar will begin to turn to an amber color.
- Watch the sugar carefully as it can burn quite easily. Once it reaches 350F add all of the butter whisking quickly to combine.
- Remove the saucepan from the heat and whisk in heavy whipping cream, whisk very quickly- the mixture will bubble up but as you whisk will calm down. Once combined mix in salt and let cool.
- Once cool pour into an airtight container i.e. mason jar, plastic container, reused spaghetti sauce jar..etc. Store in the fridge.
Chocolate Ganache
- The next day take the cakes out of the freezer and salted caramel out of the fridge In a small saucepan heat heavy cream for 4-6 minutes. In a medium-sized bowl pour in chocolate chips and pour heavy cream on top of the chocolate. Let sit for 3 minutes then stir until completely combined. The hot cream will melt the chocolate mix until fully combined and set aside.
Whipped Cream & Assembly
- In a bowl of an electric mixer whisk heavy whipping cream, powdered sugar, and dry milk powder until stiff peaks form. Set in fridge while preparing the cake.
- Cut each cake layer in half, to create 4 layers. Place one piece on cake plate/serving dish then drizzle 3 tablespoon of salted caramel on cake layer and 2 tablespoon of ganache then ⅓ of the whipped cream and an extra drizzle of salted caramel, repeat until final cake layer is on top. Place chocolate ganache on top of the final cake layer, let it drizzle down the sides of the cake. Sprinkle mini chocolate chips and drizzle more salted caramel on top. Store in the fridge.


Notes
I make this cake the day before I need it but feel free to make the day of as well.
- Prep Time: 45 minutes
- Cook Time: 30 minutes
- Category: Dessert
- Method: Baking
- Cuisine: American


Elizabeth says
Thank you 🙂
Elizabeth says
It was fabulous Elizabeth!!
beatrice says
honestly i made this for my husbands birthday and it’s amazing. everyone wanted a second piece... I really need to make two next time.
Elizabeth says
Beatrice your family sounds like mine, never enough cake to go around!
Erika Ann says
This looks unexpectedly easy! I first read the title and saw the photo and my immediate reaction was "this is not a cake I could do with my current baking skills". As I was reading the recipe and the guide, i suddenly realize that i could do this! Thanks for this!
Elizabeth says
Hi Erika, this cake is quite easy when you break it into parts! Please come back and leave a rating and review if you make the cake. I would love to hear how you get on with it!
David says
Awesome recipe. Made it for my sisters bitthday and was an absolute hit. Great quality of quantities and choice of ingredients. Great job x
Elizabeth says
Thank you for the great review David, I work hard on making sure all the quantities are right so I appreciate it so much that you noticed it! Cheers!
Liette says
Best cake I've ever made! And I've made a lot of cakes!
Elizabeth says
Thank you so much for the lovely review Liette! May I ask a favor next time would you mind leaving a star rating, please? It’s super helpful for us and other readers! Cheers
Jen says
Can you please tell me if you can at all taste the coffee in this recipe? Thanks!
Elizabeth says
Hi Jen you do not taste the coffee at all, it just enhances the chocolate flavor!! Please let me know if I can answer any further questions or help in anyway! 🙂
Jen says
Thank you! I figured that was it’s job, but do not like the taste of coffee at all! 🙂
c says
Sorry this was a fail for me. I followed the recipe exactly. The whipping cream made it a mess, hard to cut, slid around and fell apart. My daughter insisted I make this for her birthday I tried to talk her out of it. Too much work for the end result and it was not that great. Everyone was disappointed, it was not up to the standards of the usual cakes I make. Experienced baker of 35 years. Sorry to leave a bad review, but don't recommend this recipe.
Elizabeth Waterson says
So sorry you did not have a good experience with the recipe. I beat the whipped cream to stiff peaks which I think helps it not slide as much but with any large amount of whipped cream I find the cake can slide a bit. Again so sorry you were all disappointed.
Ashley says
This has become the golden standard for family birthdays. They always request it. I have made it multiple times--we have some gluten free folks so I use a gf boxed cake mix but I tweak it a lot to give it that homemade taste and texture and of course add coffee. No one can tell it is gf and even those that are not gf request it for their special day! Making it again this weekend and wanted you to know that it is very much loved. I'm going to need to invest in a cake leveler though.
Elizabeth Waterson says
Seriously thank you so much Ashley, you have no idea how much your comment has made me smile. I am so glad you were able to adapt the recipe to your family's needs. A cake leveler will be a great investment as you seem to love to bake!! Thanks again for coming back to rate the recipe, it really helps me out! XX Liz
Lazy DM says
Just made this, haven’t served it yet so I can’t comment on the taste and cutting and such. Maybe I missed something in the steps, but my ganache ran down the sides to far, made a mess on the cake board. To thin or to warm? I didn’t use it all either.
My cakes didn’t rise all that high, just enough to cut, but seems moist. The edges seemed to cook first, to quick. Think I need better cake pans.
Should it be chilled when put together, before being topped with ganache?
Elizabeth Waterson says
Hi Lazy DM, thanks for reaching out. Cake pans will definitely affect the bake of the cake- I use the brand Fat Daddios you can get them on Amazon and they bake my cake layers beautifully. The ganache may have been to thin, in the future, you can chill the ganache so it thickens up a bit before using it. Yes chill the cake and store it in the fridge. I hope you enjoy the taste, my family requests this cake all the time. Let me know if I can help with anything else. XX Liz
Alessia says
Hi, I wanted to know if it's possible to make the sponge in just one baking pan and then cut it into 4, if yes do you know approximately how much longer does it need to stay in the oven? Thank you
Elizabeth Waterson says
Hi Alessia, I have personally never done that. You could try baking it for 17-22 minutes, I would think that would be around the time. Just check for a toothpick inserted in the center to come out with no wet batter, moist crumbs are okay! Please let me know if you have any further questions, if I can help in any way or if you make the cake! XX Liz
Genna Kendall says
Any tips for making this into a cupcakes version. I followed the recipe but I am wondering if I filled the cupcake cases too full for the amount of rise I got... that or the combination of baking powder and bi carb is too much for cupcakes?
Elizabeth Waterson says
Hi Genna, since the cake has a fair rise on it I would only fill cupcake liners about 1/2 way full, but I have personally never made these into cupcakes. When I try that I will report back but if you try them again please do let me know. Please let me know if you have any further questions or if you make them again I would love to know how they work out!! Take care. xX Liz
Kasia says
I made this cake twice now for my sons birthday and it is amazing! Light and perfectly balanced. Not too sweet or rich. Just perfect - everyone will be asking for seconds and thirds. I will be honest I store bought salted caramel sauce because making it is the hardest part of the recipe and you can buy really good ones in store.
Ash says
This was absolutely divine! I made my caramel sauce ahead but rest of it I made on the day of my party and it was totally easy. Just follow the recipe to the T. It was a complete hit!
Elizabeth Waterson says
Hi Ash, thank you SO much for coming back to star rate and review the recipe. I truly appreciate it. So happy you enjoyed the cake!! Take care. XX Liz
Janet Phillips says
I did not see this addressed but the ganache calls for 18oz of heavy cream and in parenthesis it has 2/3 cup. That is a big difference and I'm not sure which measurement is correct
Janet Phillips says
You must have changed the measurements on the ganache after I read the ingredients. At first reading it has 18oz heavy cream and 30oz chocolate chips. Now it has 6oz heavy cream and 10oz chocolate chips. I am totally confused now.
Elizabeth Waterson says
Hi Janet, sorry for the confusion I think you may have accidentally pressed the 3X button on the recipe card which triples the ingredient quantities. The recipe as written calls for 6oz (⅔ cup) Heavy Whipping Cream and 10oz Semi-Sweet Chocolate Chips. Please let me know if you have any further questions or if you try the recipe would love to know what you think! XX Liz