

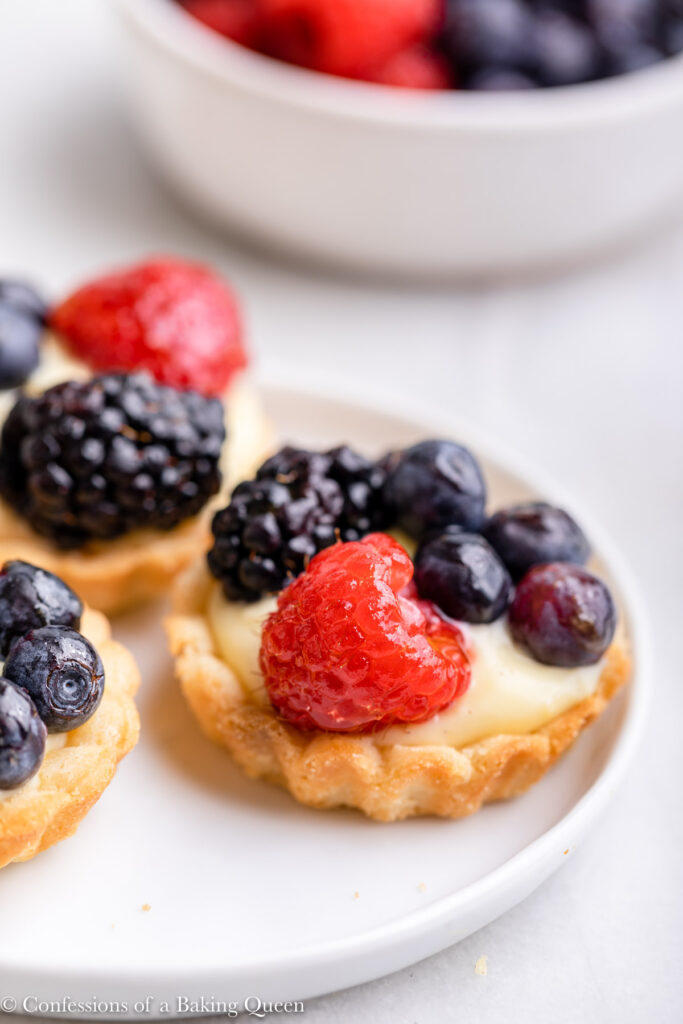
Mini Fruit Tarts are an elegant, make-ahead dessert that steals the show. Crisp, buttery shortcrust shells are filled with creamy pastry cream and topped with fresh berries. You can prepare the shells and cream in advance-just fill and glaze before serving for a stunning, sophisticated treat.
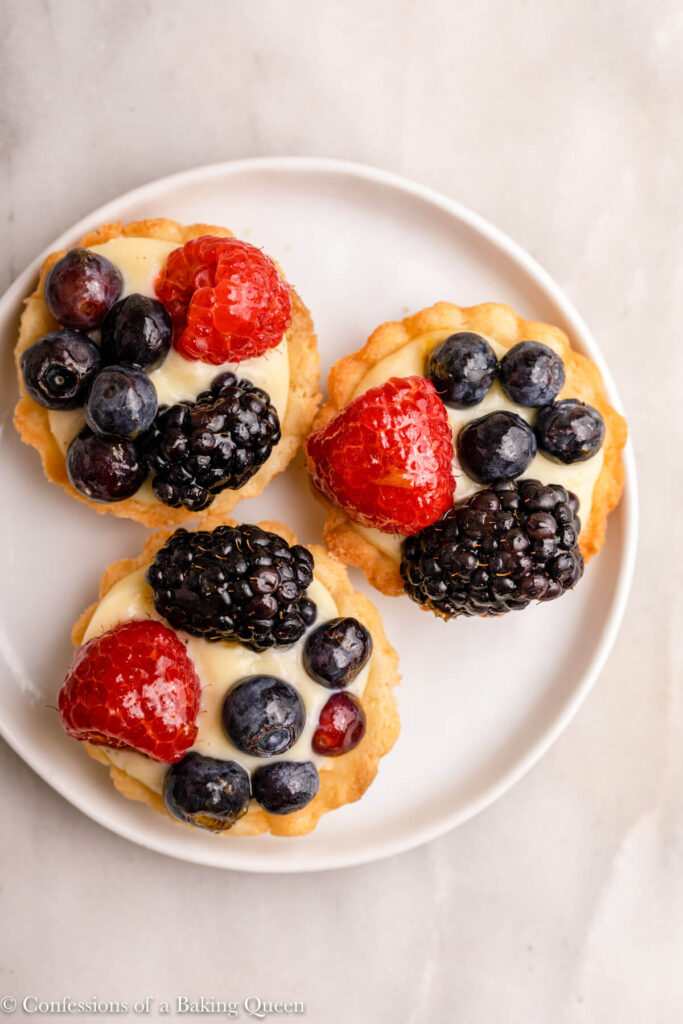
One of my favorite treats to order at a bakery is a fruit tart. There is something so perfect about the crisp, buttery tart shell, filled with luscious creamy pastry cream and topped with juicy fruit. While these are not hard to make, they can be time-consuming. You want to plan ahead when making these, it's not like a batch of cookies you can start to finish in 30 minutes.
This is also why I love these for parties. You can make the pastry cream a day or two ahead of time and just keep it in the refrigerator in an air-tight container. The tart shells can also be made ahead of time, I usually make them the day before and keep them in an air-tight container at room temperature. You can also wash (and slice) your fruit ahead of time. So when it comes time to serve you are just assembling them.
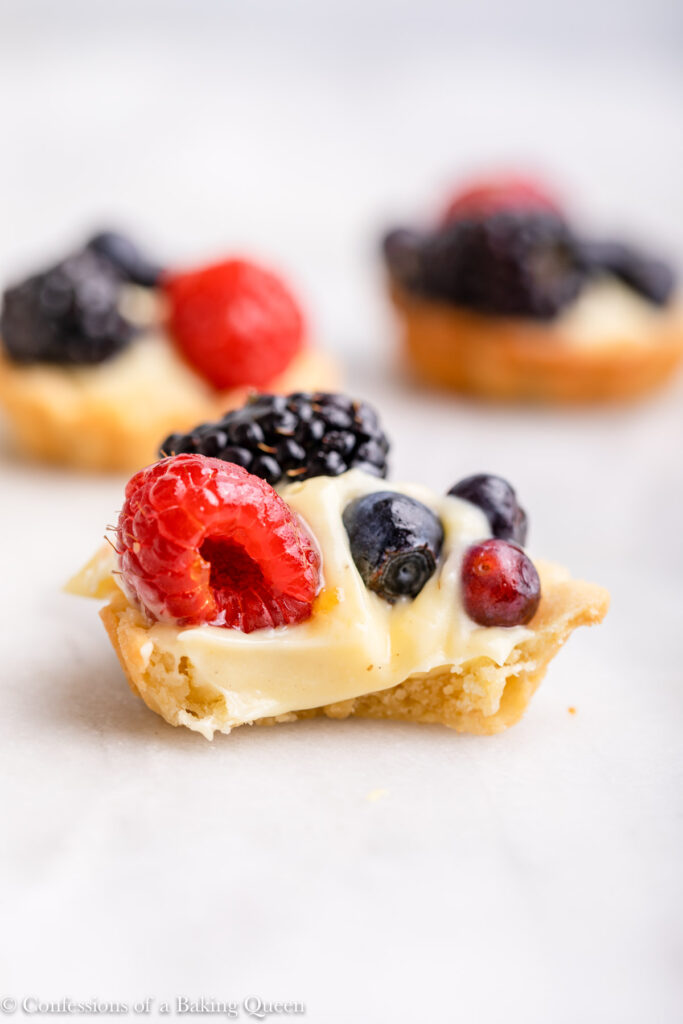
These fruit tarts are best served quite soon after assembling as the pastry cream can soften the pastry and eventually turn into a soft pastry shell. In the past, we have spread a thin layer of melted chocolate on the pastry shell and let it harden before filling it with pastry cream. This creates a barrier and gives the pastries a bit longer life.
Why Sweet Shortcrust + Pastry Cream Works So Well
You need three main components here:
- Tart Shells. I show you below how I roll out the tart shells but if you want to see an in-depth tutorial on how to make the sweet shortcrust pastry check out my sweet shortcrust pastry recipe page. You can make the shells a day or two before using them.
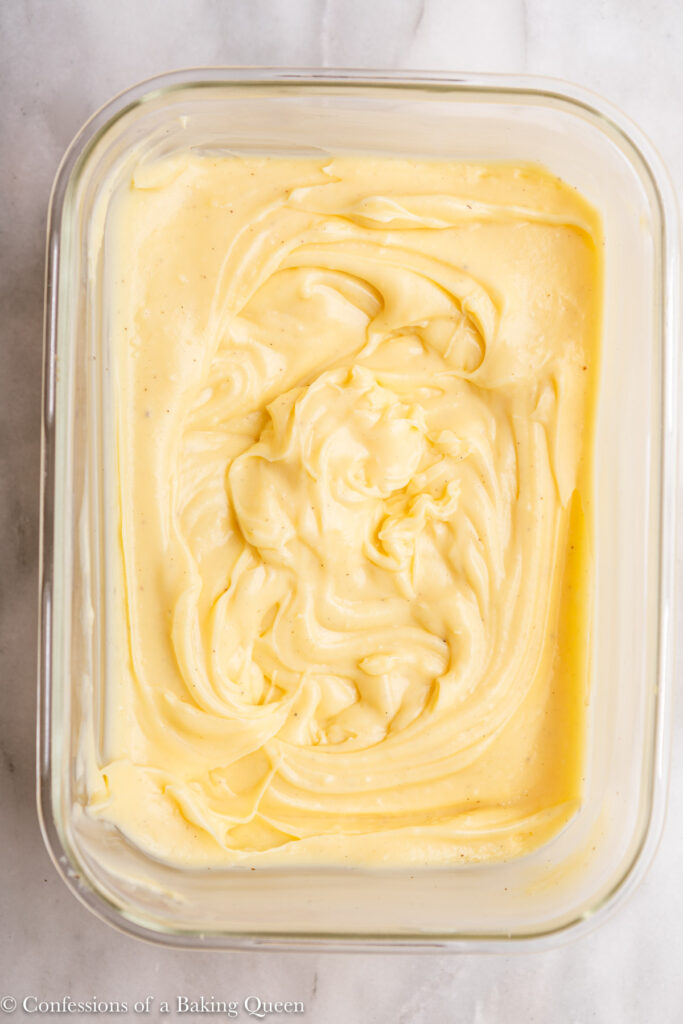
- Pastry Cream. The recipe card below describes how to make the pastry cream but again if you want to see an in-depth tutorial on how to make pastry cream check out my pastry cream recipe. You can make this a couple of days in advance. You'll need whole milk, egg yolks, cornstarch, sugar, salt, butter, and vanilla bean paste or vanilla extract.
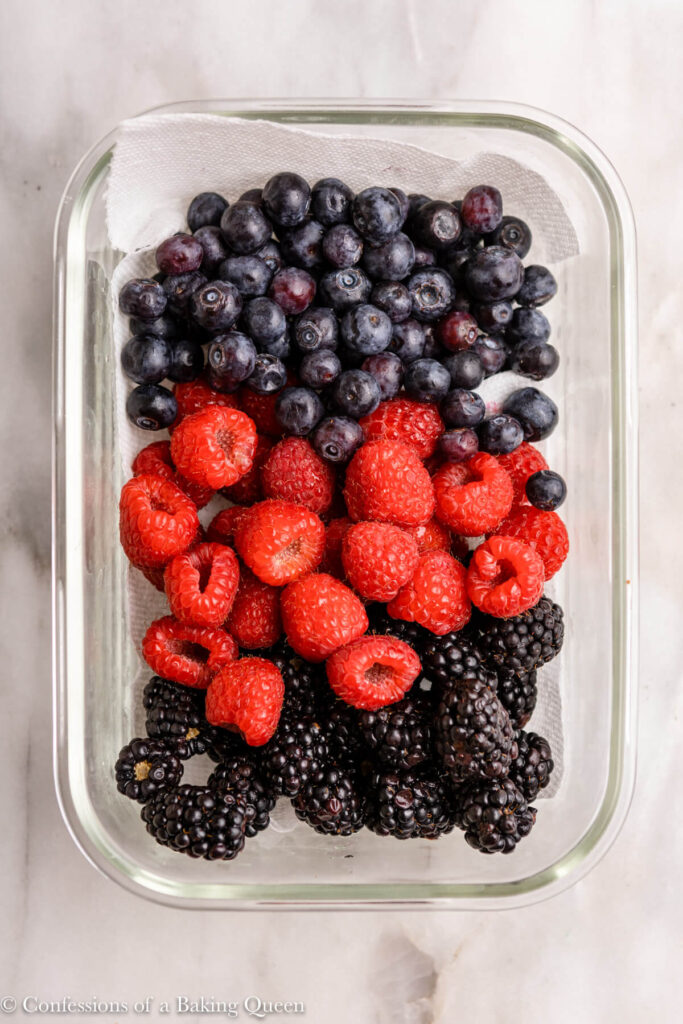
- Fruit. We often just use a selection of fresh berries; raspberries, blueberries, blackberries, or strawberries. But adding slices of kiwi, mandarin oranges, or mangos are great too!
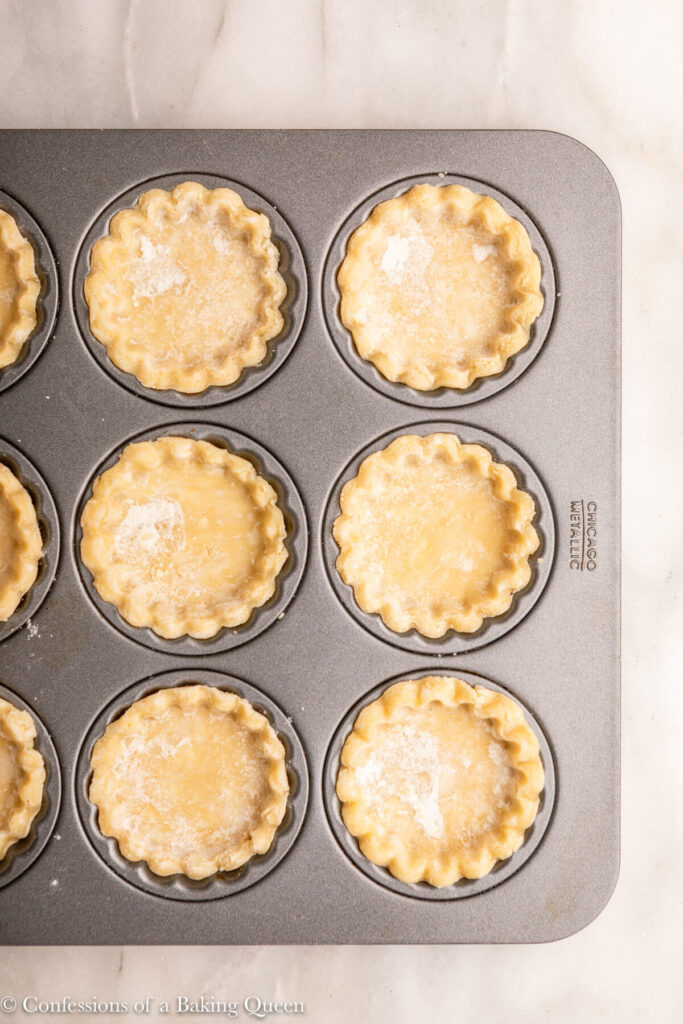
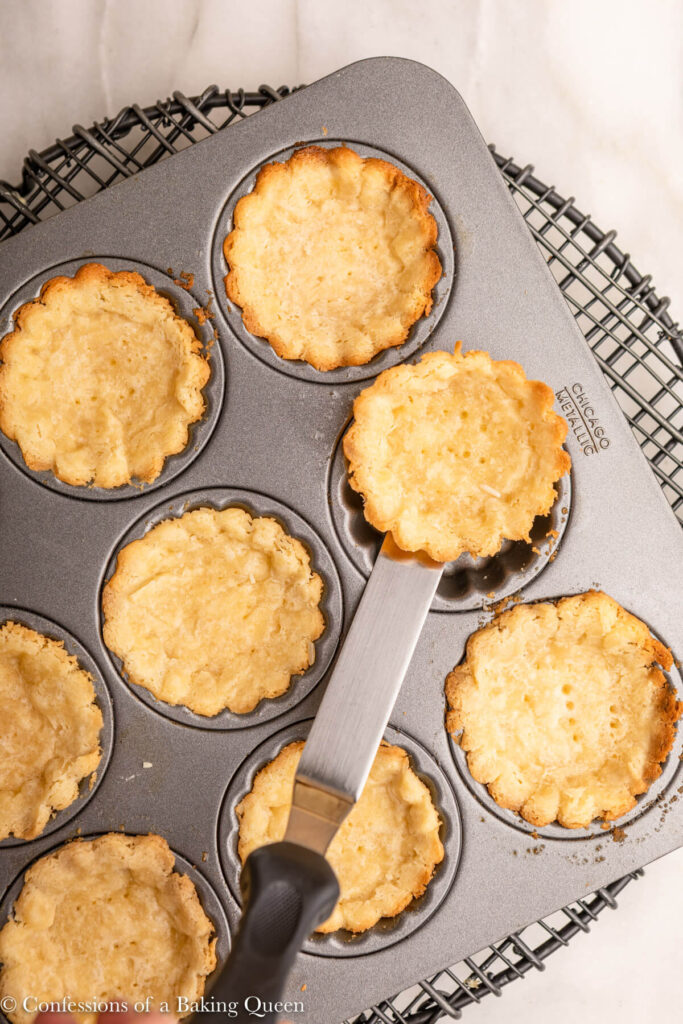
You can use individual tart molds or a mini tart tray. I have a Chicago Metal one that I bought from Williams Sonoma years ago, unfortunately, I cannot find it for sale online anymore. Aim for tarts around the 2-inch to 3-inch size.
If you would prefer one large tart then check out my recipe for a classic fresh fruit tart.
Bake Shells, Fill Cream, Top with Fruit
The tarts are best served soon after assembly so I don't suggest assembling more than a few hours before serving. These are not freezer-friendly desserts.
More individual party dessert ideas
- My mini English trifles are always a hit! And you can prep these ahead of time as well.
- Filing my choux pastry with coffee pastry cream is a family fave!
★★★★★ Please let me know if you make this recipe by leaving a star rating and comment below!
Make sure to join our Newsletter and follow us on Pinterest, Instagram, Facebook, & Twitter.
PrintRecipe Card

Mini Fruit Tarts
Whether you're entertaining guests or just want a little something sweet, a plate of mini fruit tarts is an elegant dessert that's easy and fun to make. Here we show you how to make mini fruit tarts with step-by-step photos! The best part is you can prep most of it a couple of days in advance!
- Total Time: 3 hours 5 minutes
- Yield: 20 Mini Fruit Tarts 1x
Ingredients
Pastry Cream
- 5 Large Egg Yolks
- ½ cup Granulated Sugar/ Caster Sugar
- 3 ½ Tablespoon Cornstarch/ Cornflour
- 2 cups Whole Milk
- ¼ Teaspoon Salt
- 4 Tablespoons Butter, cold and diced
- 2 Teaspoons Vanilla Bean Paste or Pure Vanilla Extract
Sweet Shortcrust Pastry
- 1 Tablespoon + 2 Teaspoons Heavy Whipping Cream
- 1 Large Egg Yolk
- 1 Teaspoon Pure Vanilla Extract
- 156 grams (1 ¼ Cup) All-Purpose Flour/ Plain Flour
- 80 grams (⅔ Cup) Powdered/ Icing/ Confectioners Sugar
- ¼ Teaspoon Salt
- 4oz (8 Tablespoons) Butter, cold & cut into 12 chunks
Toppings
- Fresh Fruit (Blackberries, Raspberry, Blueberries, Strawberries, Kiwi or Mango)
- Apricot Jam
Instructions
Pastry Cream
- In a medium saucepan over low-medium heat add the whole milk. Let cook for a couple of minutes to warm it up - do not boil the milk.
- While milk is warming, in a medium bowl whisk together the egg yolks, corn starch, salt, and sugar. Whisk for two minutes, the mixture should be much lighter in color.
- Once the milk mixture is warmed slowly add a little bit to the egg mixture and whisk to combine. Then add all of the milk slowly and whisk to combine.
- Add mixture back to the pot and cook over low-medium heat for another couple of minutes, whisking constantly. The mixture will thicken up. You want it quite thick, the mixture will "burp" bubbles will pop on the surface- this shows it is done.
- Take off the heat and immediately add the cold butter and vanilla bean paste or extract. Then pour into an air-tight container, place plastic wrap on top, and push directly on top this helps prevent a thick skin from forming. Let chill in the fridge for at least two hours or up to three days. Rewhisk the pastry cream before using it.
Shortcrust Pastry
- Mix together the egg yolk, heavy cream, and vanilla extract in a small bowl. Set that aside. In a large bowl or food processor add the flour, sugar, and salt, process until just combined, about 10 seconds.
- Add the cold butter chunks and pulse on high 10-15 times- you will have a crumbly texture with some chunks of butter. If mixing by hand use your fingers to rub the butter into the flour until a coarse meal is formed. Don't overmix it you want small chunks of butter left.
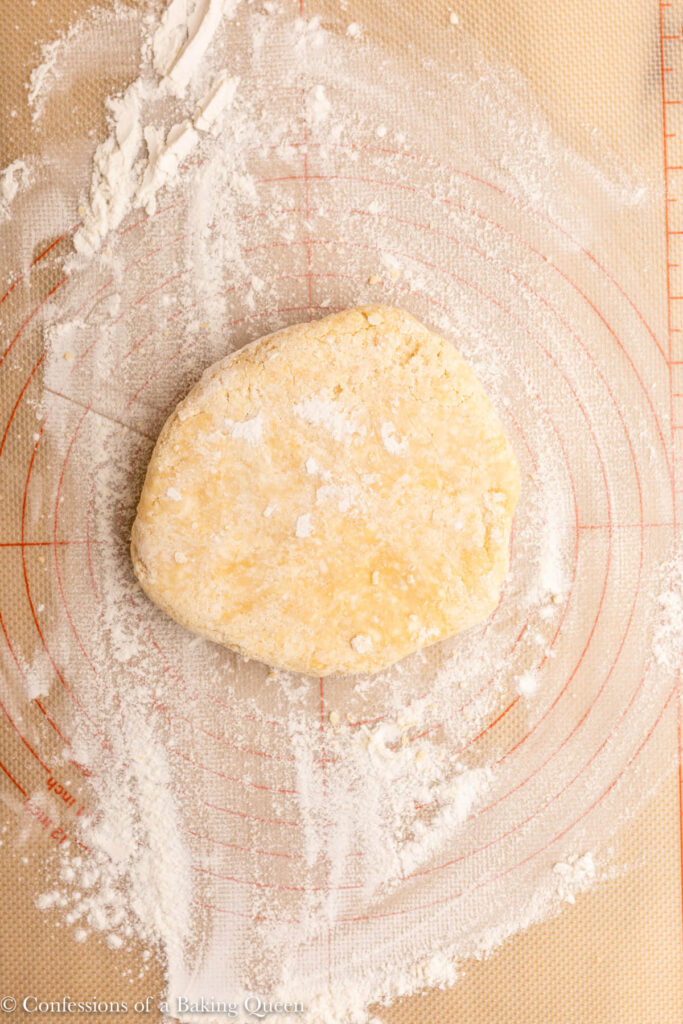
- Gently stream in the cream/ egg mixture. If using a food processor the dough, will lump up into a ball, turn off, do not over mix. It does not need to be one cohesive ball as soon as you tip it out of the bowl you can gently press the dough together to form one cohesive ball.
- Place tart dough onto a clean surface and pat into a 6 inch round disc. Work quickly, you don't want to spend too much time working with the dough as the warmth of your hands can melt the butter. Wrap the dough disc tightly in plastic wrap and let chill in the fridge for 30 minutes or up to 4 days.
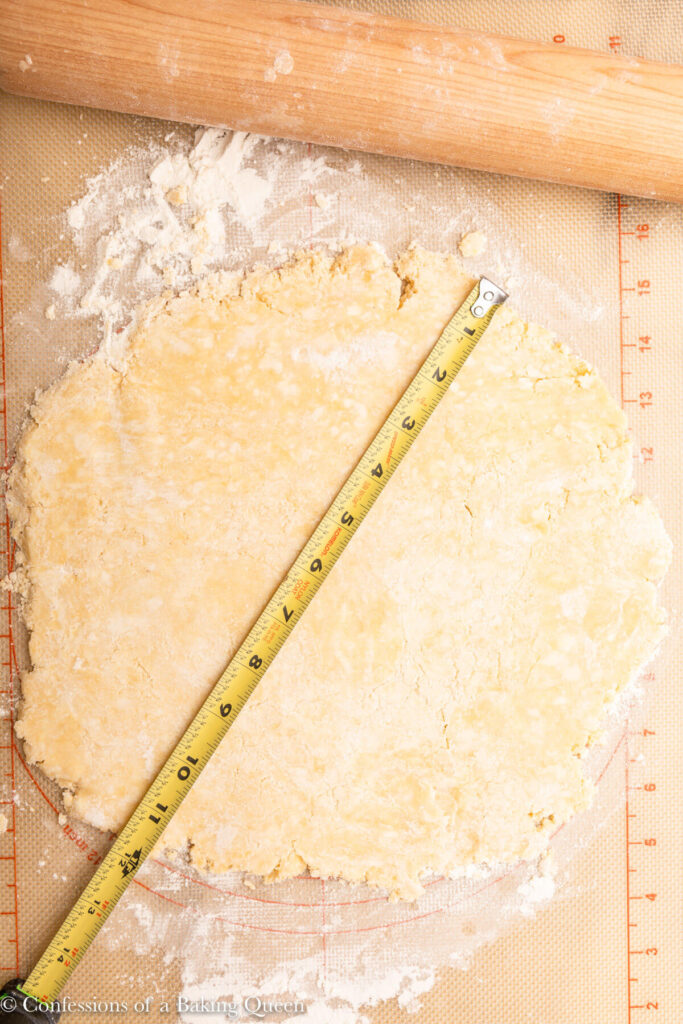
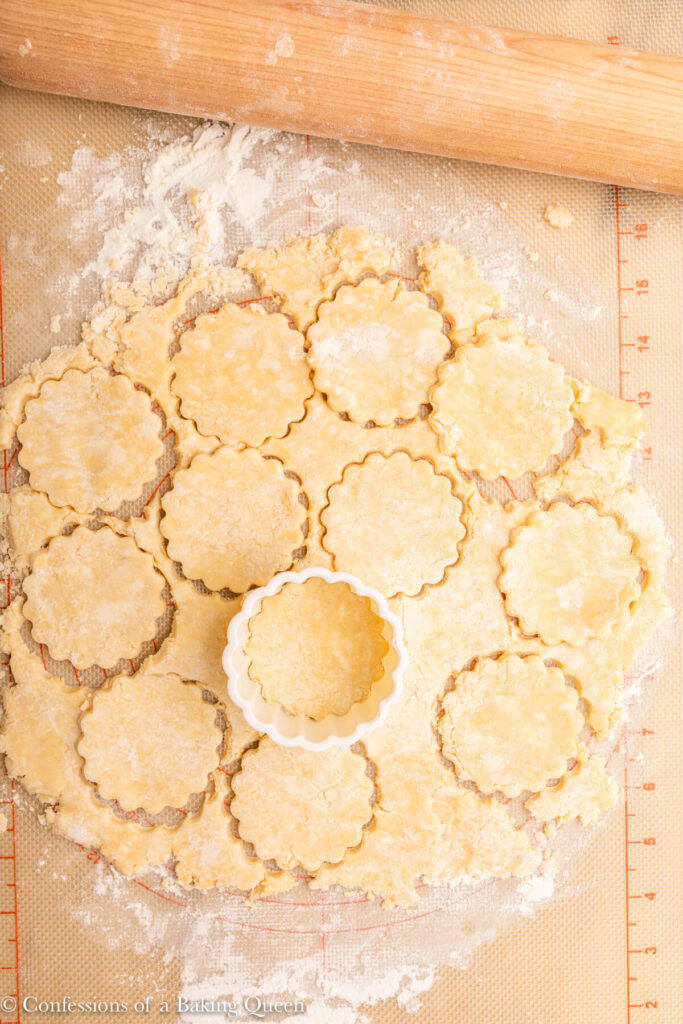
- Once the dough has chilled for 30 minutes (if it is in the fridge for more than 30 minutes let the dough sit out to soften a bit before rolling out) place it on a lightly floured work surface and use a rolling pin to gently and evenly roll the dough to ⅛" inch thick, about a 12-inch circle. Make sure to turn the dough multiple times to ensure an even dough. Use a cookie cutter that is large enough to fit your mini tart pan or mini cupcake pan. I got 20 tarts.
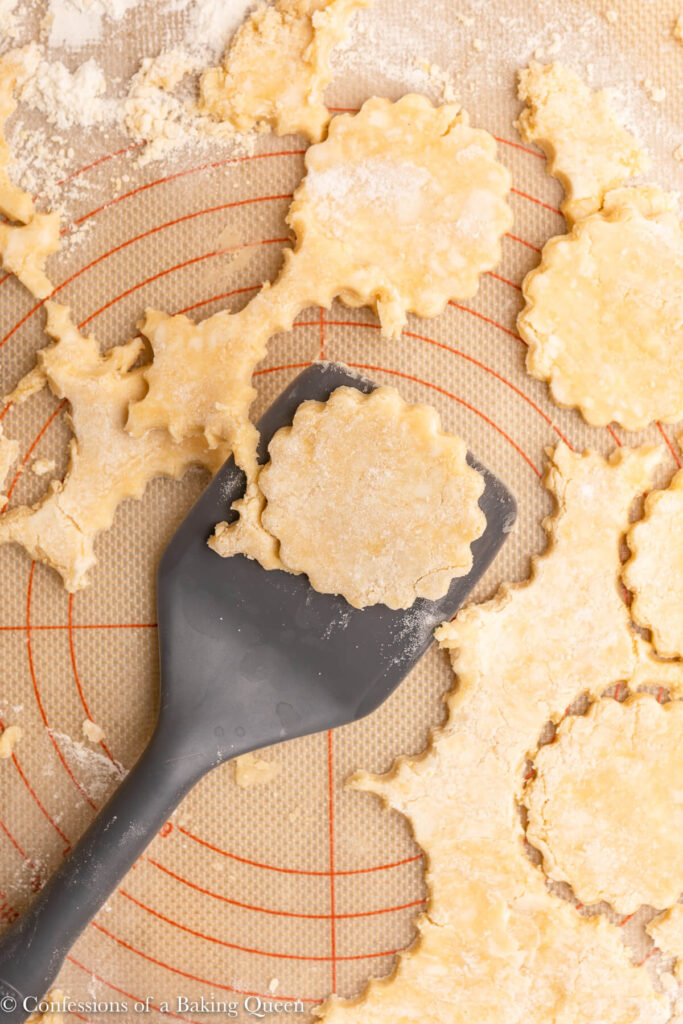
- Gently use your fingers to press the dough into the mold- if it cracks a little don't worry just press it back together. Use a fork to prick the crust all over then place it in the freezer for 30 minutes or up to two days (if freezing for longer than 30 minutes wrap the tin in plastic wrap). It is important for the dough to be ice cold when it goes into the oven.
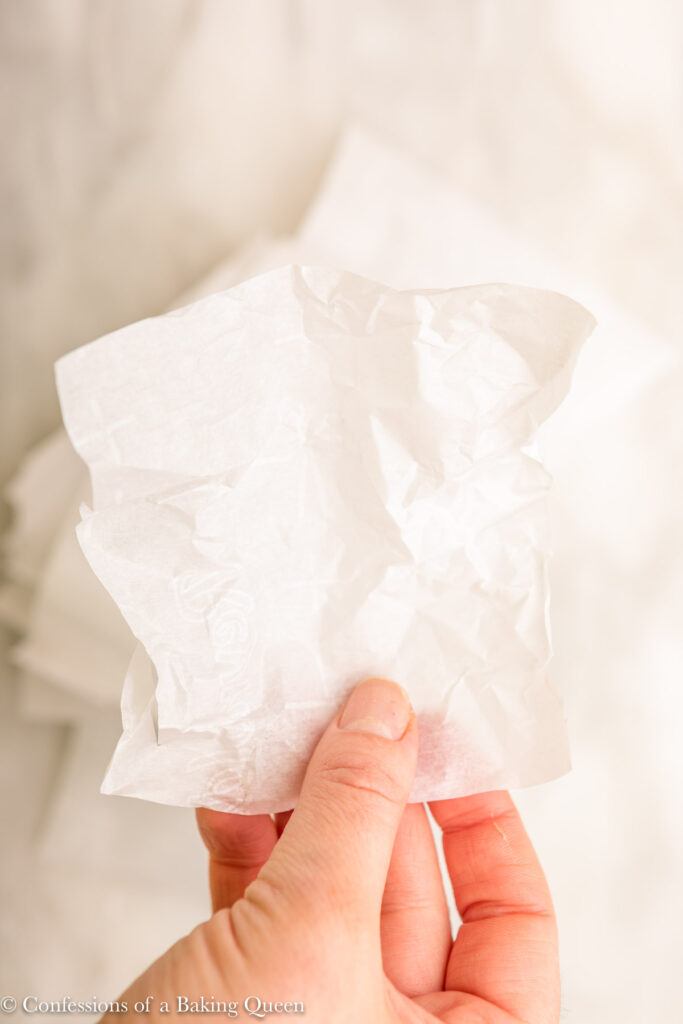
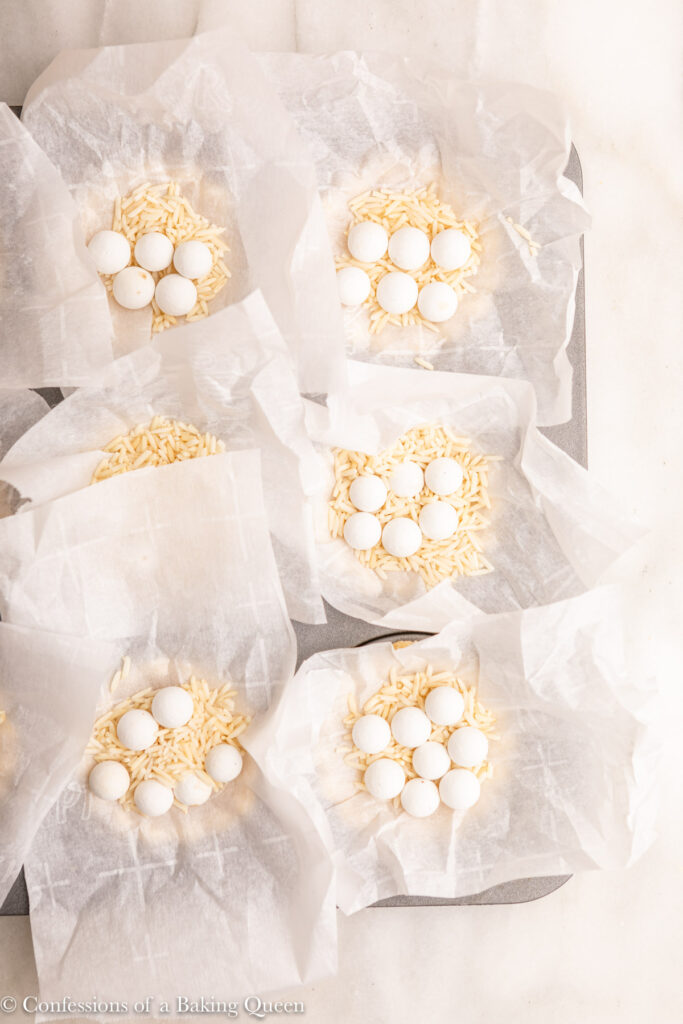
- When ready to bake preheat the oven to 375F/190C. Use parchment paper pieces or lightly spray a piece of foil with non-stick cooking spray and gently press against the tart-greased side down. Fill with dry beans, rice, or pie weights.
- Place the cold tart tin on a baking sheet and bake for 11 minutes then gently remove the foil and bake for another 2-3minutes or until golden brown. Gently place the tart tin on a wire rack to cool completely before using.
Assembly
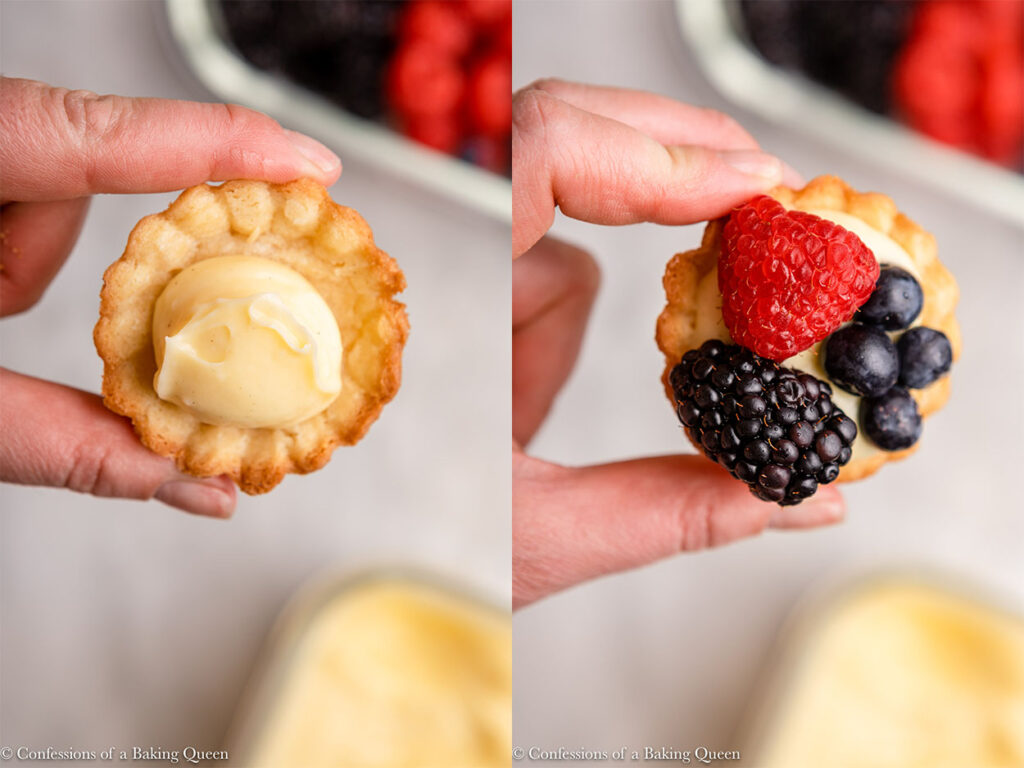
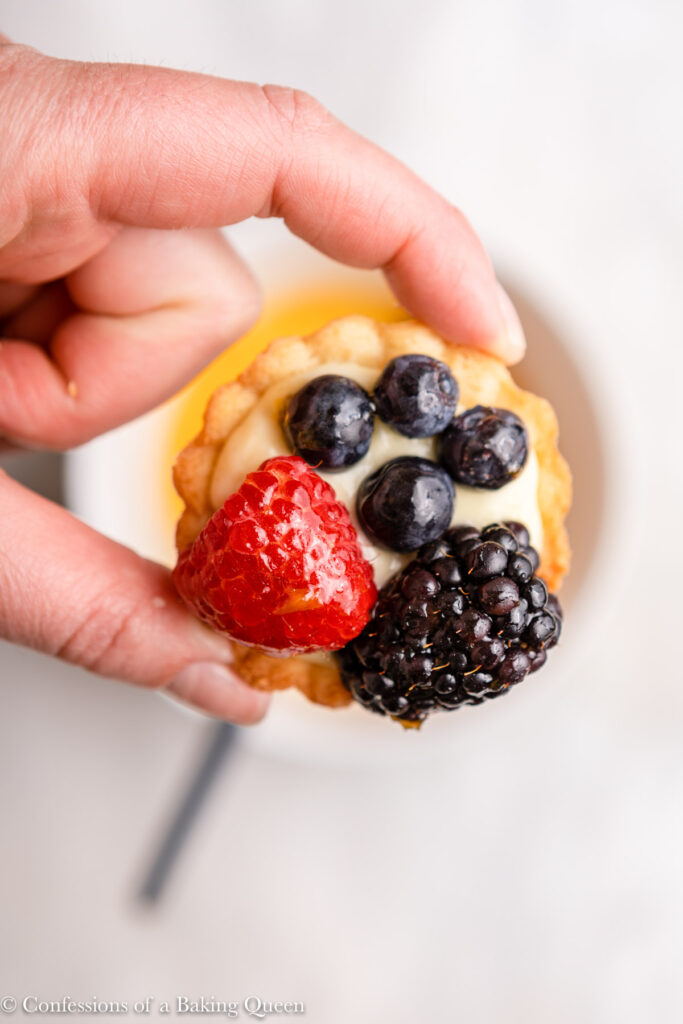
- The tarts are best served soon after assembly so I don't suggest assembling more than a few hours before serving. Take one tart shell and fill it with pastry cream, but not too full as the fruit will press the cream out. Add your fruit.
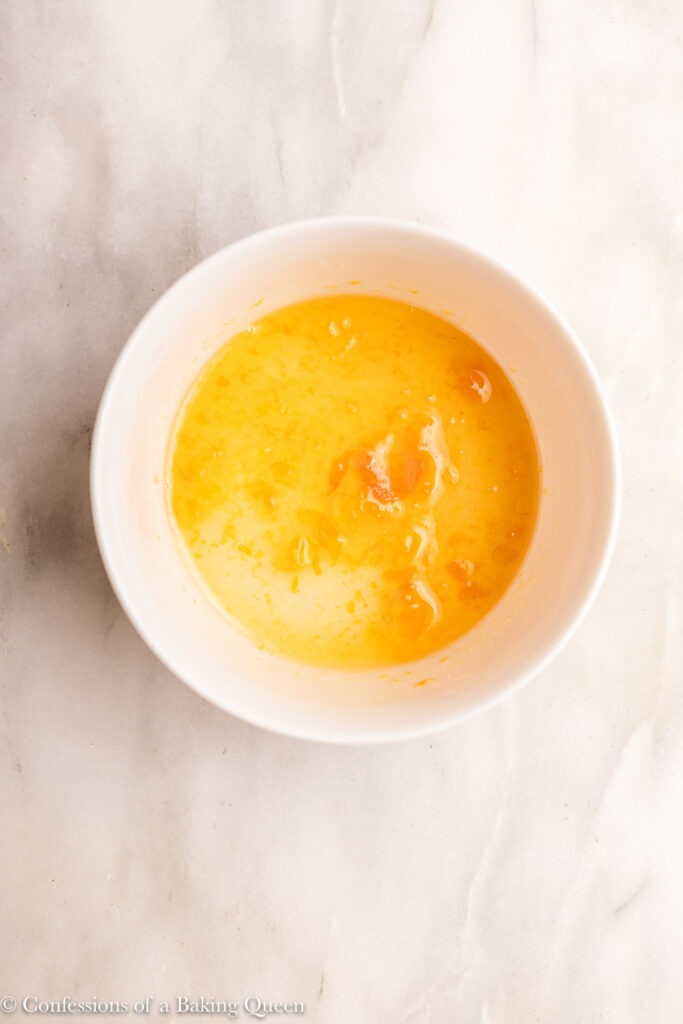
- In a small saucepan over low heat or in the microwave melt together some apricot jam with a splash of water to thin it out. Once melted use a pastry brush to brush the fruit with the glaze. Serve immediately or store in an air-tight container in the fridge.


Notes
- My mini tart tin has tarts that are about 2-inches or so and so the cutter I used was about 2.5" or so. I would cut one tart shell and place it in your tray to see if you need to make larger or smaller pastry rounds for your tart tin.
- Prep Time: 30
- Chill Time: 2 Hours
- Cook Time: 35
- Category: Dessert
- Method: Bake
- Cuisine: American


Olivia says
I used this recipe 2x and the proportions were so off. It made double the custard and less than 40 cups. I had a ton of custard left over. I also had trouble with the dough. It was really sticky. I have to keep using flour to be able to roll and cut it.
Aside from this, it was a really delicious recipe. Everyone loved it.
Elizabeth Waterson says
Hi Olivia, the dough can be a little finicky you have to be very precise with the measurements, but you did the right thing by adding a bit more flour to roll it out. I am sorry you didn't get 40 cups, the dough might have been too thick. I am glad to hear you enjoyed the fruit tarts though. XX Liz
Roberta says
These are so delicious. I can’t wait to make them again
Shelle Willis says
Can you use something else to make the glaze?
Elizabeth Waterson says
I always use apricot jam or orange marmalade. You could use a berry jam it will just give it more of a pink sheen. Hope that helps! Please let me know how you like the recipe! XX Liz
Ruthie says
I made double batch of this when I was cooking it.. it did thicken on the stove. I mainly took it off and put it in a bowl in about 15 minutes later, put it in the fridge.
When I took it out the next morning, it had gotten super runny.. I think it may have needed to cool on the cupboard for a couple hours before it got put in the fridge?
My whole batch was ruined, and I was gonna sell an order of these and had to cancel the sale. The flavor was amazing.
I'm just so sad that it did not thicken up right
Elizabeth Waterson says
Hi Ruthie, I am so sorry to hear that. I have never had that issue before. Usually it thickens up more in the fridge rather than going runny. So sorry! XX Liz