

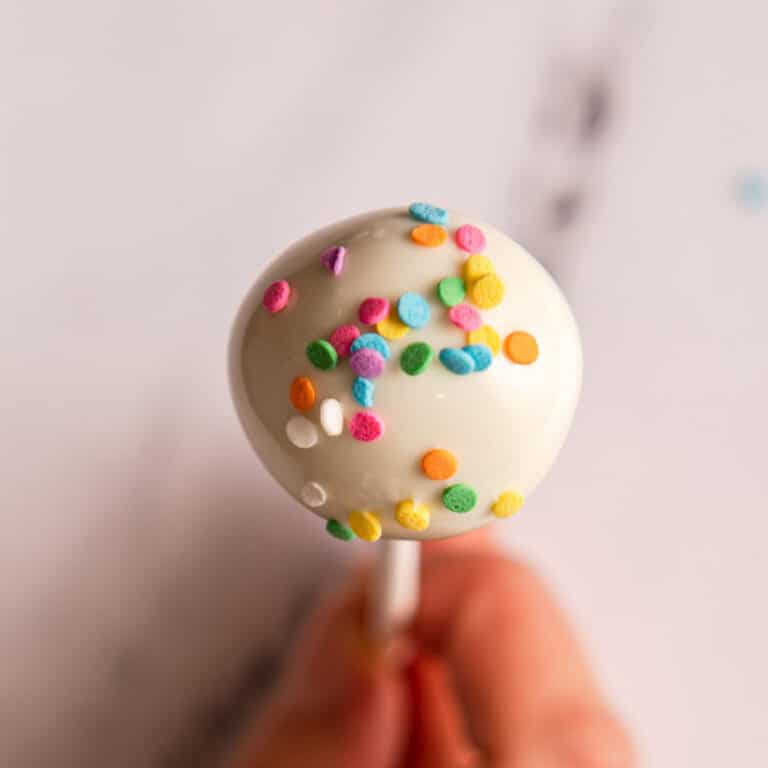
This easy recipe teaches you how to make cake pops. A perfect party dessert, everyone loves these individual cake balls! This cake pops recipe is customizable and easy for beginners!
When cake pops first came out, gosh it must be ten years ago at least, they were the favorite party treat, I went to a lot of baby showers in the last ten years, and let me tell you 75% of those showers had cake pops! All these years later, cake pops remain a favorite for parties. My niece and nephew go nuts for these. They adore the iconic light pink cake pops from Starbucks, those are just white cake with white frosting and you can use light pink candy melts to mimic the color, and don't forget the white sprinkles!
What kid doesn't love cake and frosting dipped in chocolate?! Sounds like the ultimate treat to me!
That is the beauty of cake pops, you can make totally personalized cake pops for your occasion. Dip them in pastel-colored candy melts for Easter, dark colors for a Lego party, white cake pops with gold sprinkles for an elegant soiree, or pick your favorite sports team colors!
Let's get to the recipe
Ingredients
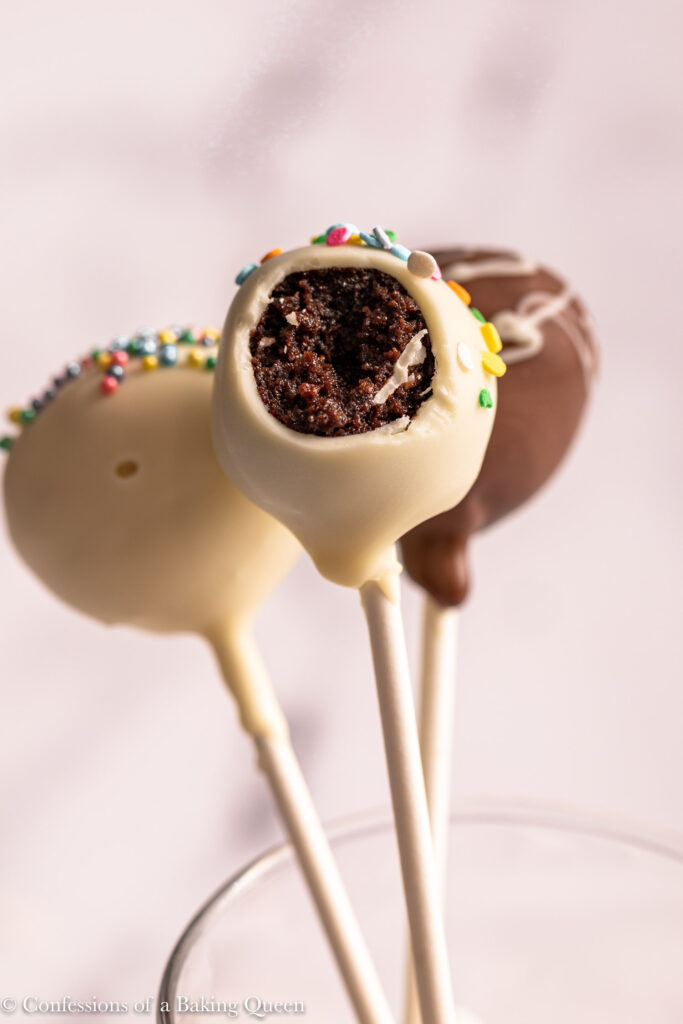
Cake pops are fully customizable. You really only need three ingredients; a baked cake, a batch of frosting, and melted chocolate. I recommend using an American buttercream style frosting.
Since you are literally crumbling the cake up and mixing it with frosting I suggest just using a box cake mix but this is also a great way to repurpose leftover homemade cake! Just make sure you let your cake cool completely before proceeding to make cake pops.
I have a long post dedicated on how to make American buttercream and don't worry there is a chocolate buttercream recipe too! You are not going to need a ton of frosting, and each batch of cake pops will need a slightly different amount. Each baked cake will have varying degrees of moisture, a super moist cake will need less frosting than a drier cake.
The flavor options are endless
- Chocolate Cake + Chocolate Frosting
- Vanilla Cake + Vanilla Frosting
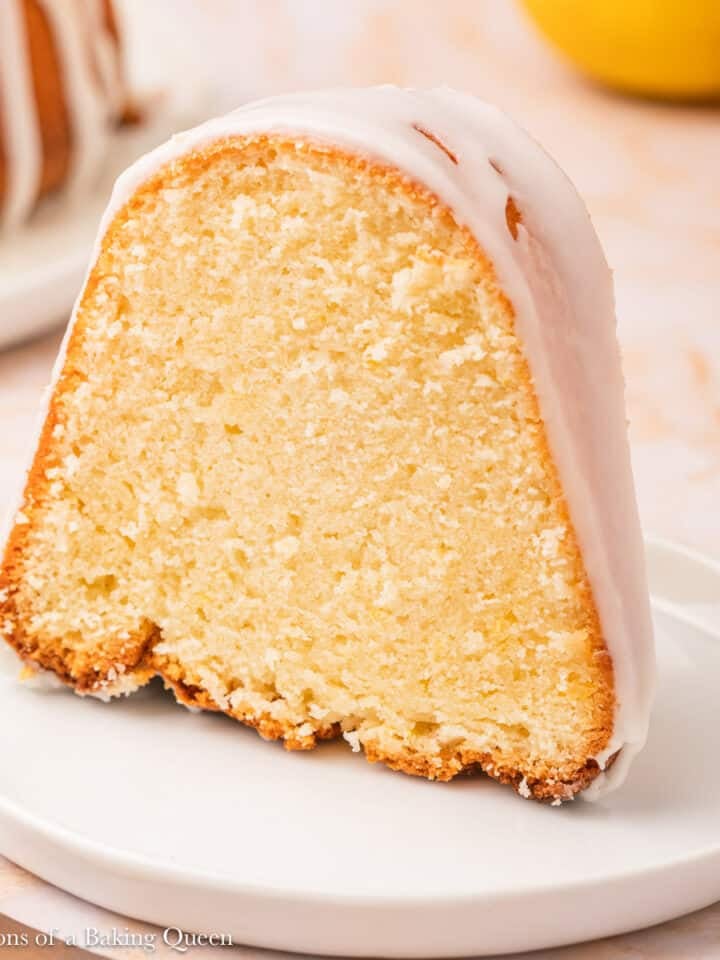
- Lemon Cake + Lemon Frosting
- Carrot Cake + Cream Cheese Frosting
- Red Velvet Cake + Cream Cheese Frosting
You get it, you can go crazy with flavor ideas!
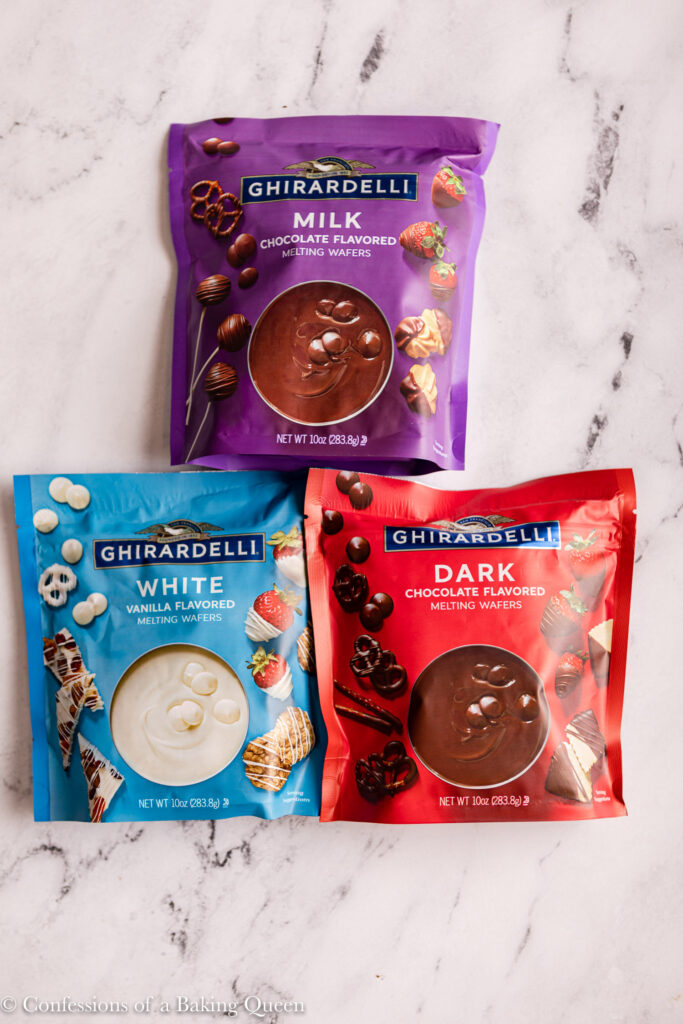
I like to use the Ghirardelli Melting Wafers, they come in white chocolate, dark chocolate and milk chocolate! But candy melts and regular chocolate works great too. I just am not fantastic at keeping chocolate tempered so I like using the wafers.
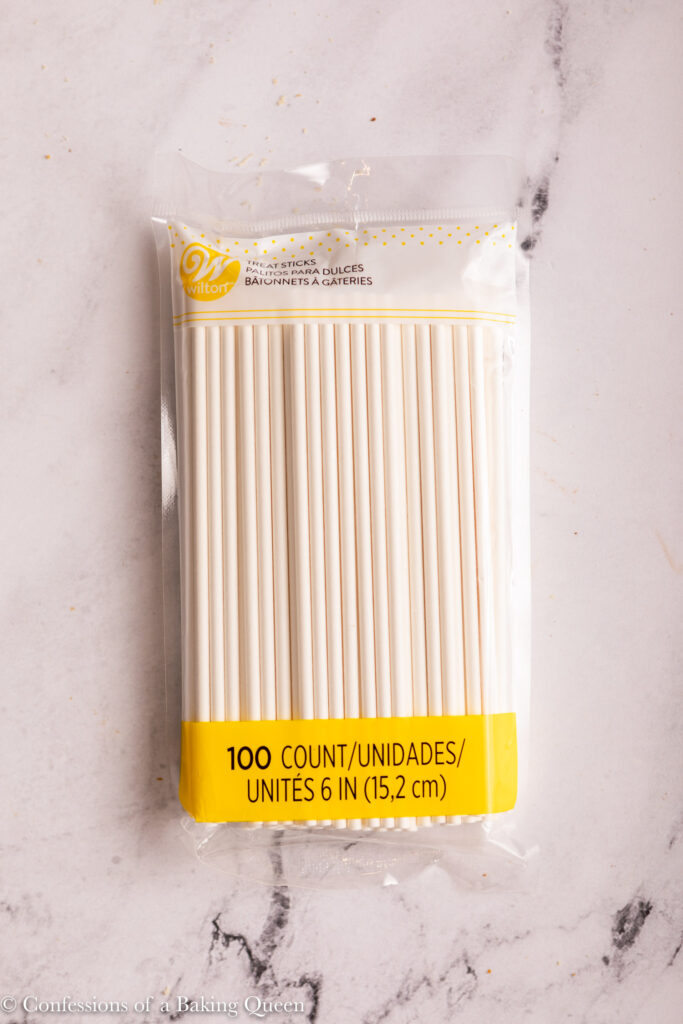
You'll also need lollipop sticks.
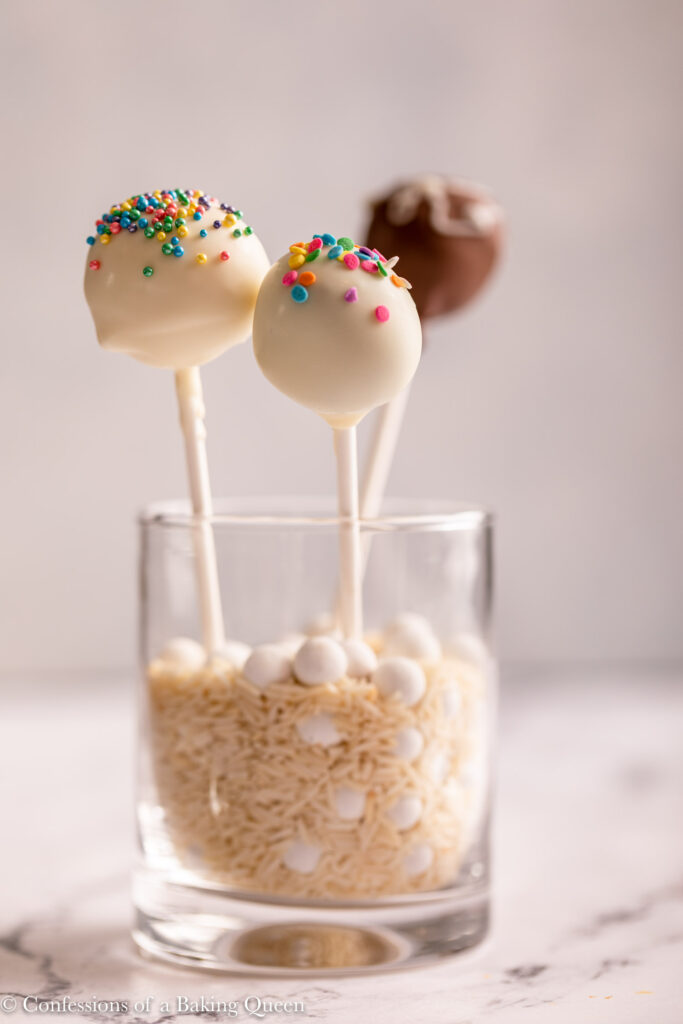
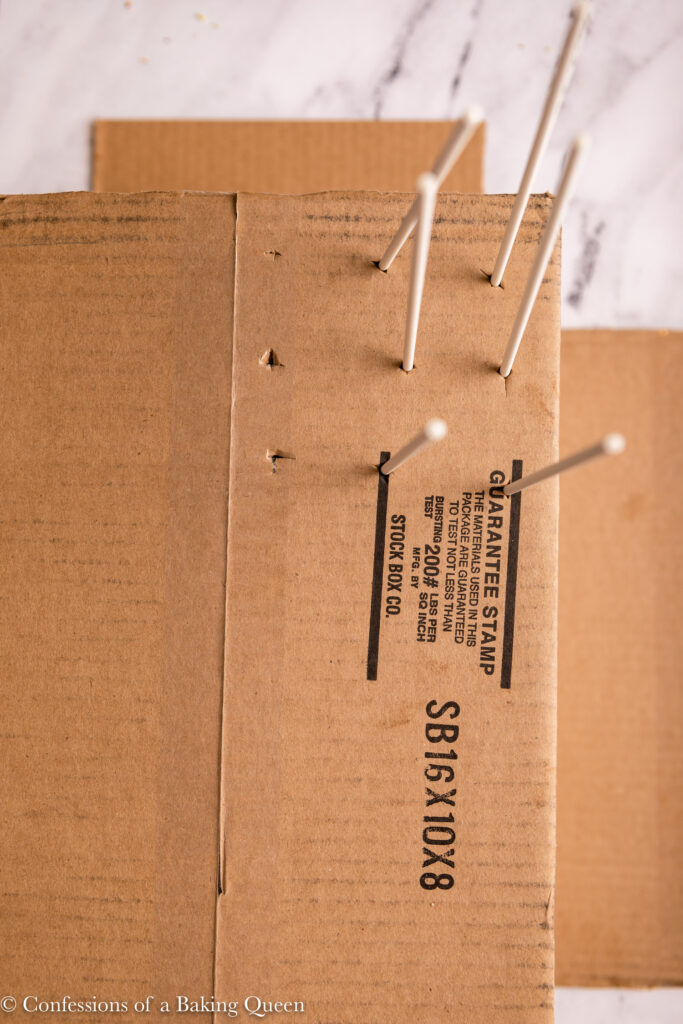
And somewhere for the cake pops to dry. You can take a cardboard box and use a knife to make to marks to make an "x" then stick the lollipop stick in. You can also use a glass filled with dried rice or beans and stand the cake pops up that way.
Instructions
Please keep in mind your cake must be baked and completely cooled before proceeding.
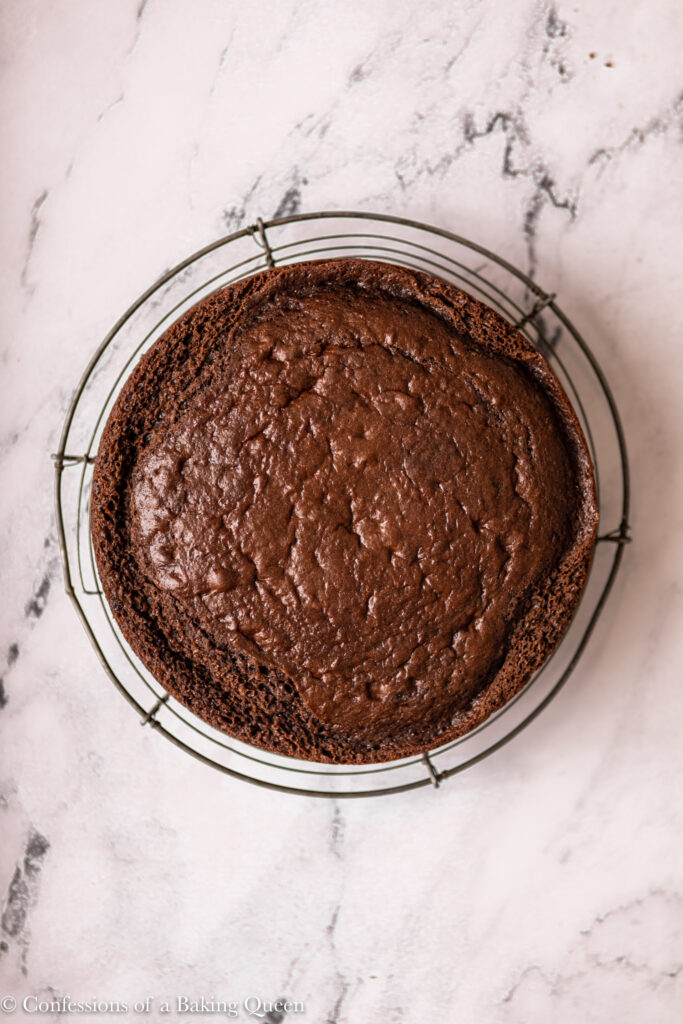
Once your cake has cooled in a large bowl crumble the cake into crumbs. The cake crumbs should be small crumbs, no large chunks of the cake should be left. Some people like to cut the edges of the cake off to prevent any thicker clumps of cake, I personally don't have a problem with it.
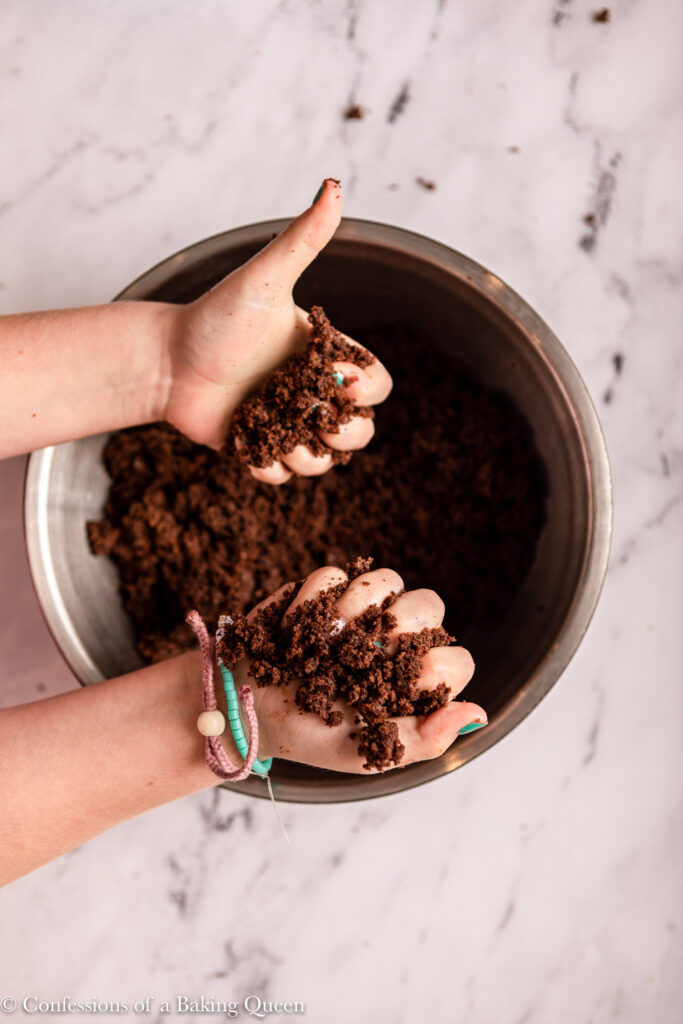
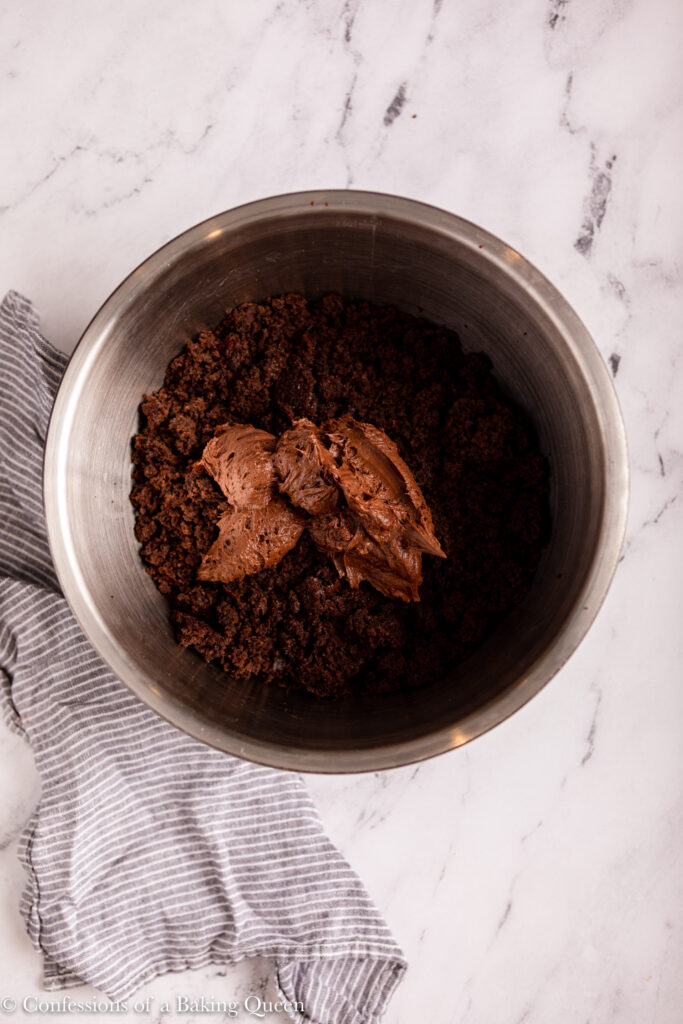
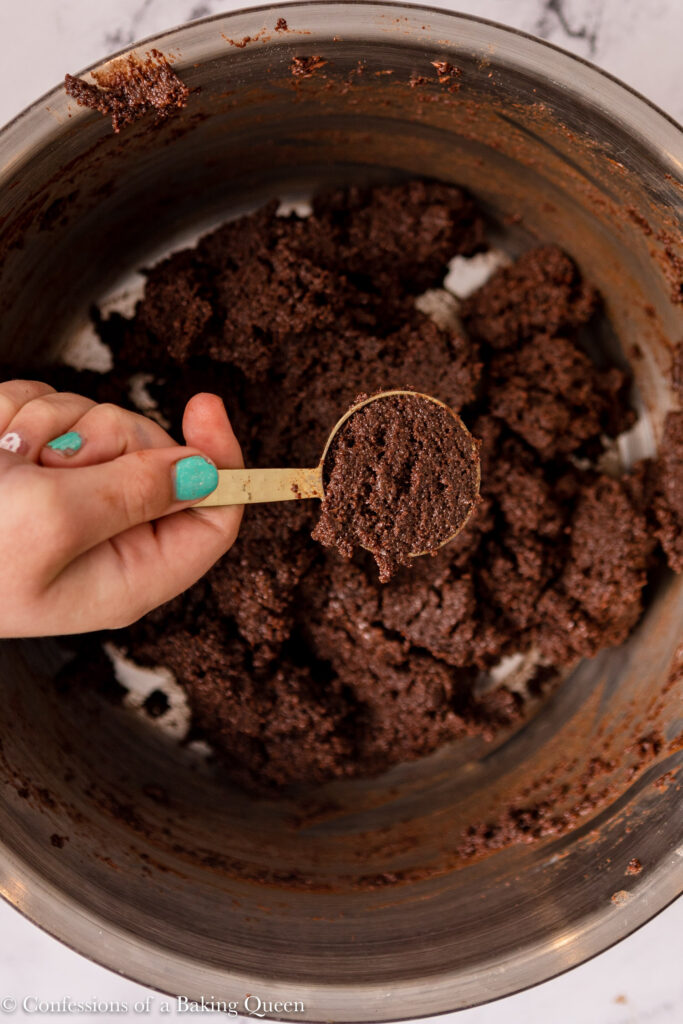
Add half of the frosting required and stir together, then add a bit more frosting at a time until you are able to grab a chunk of the batter and press it together and it holds itself together easily. The trick is to not overly wet the cake with too much frosting, then you will just have too much mush. But be careful too little frosting will cause the balls to crack and fall apart, you do want a very soft, moist consistency.
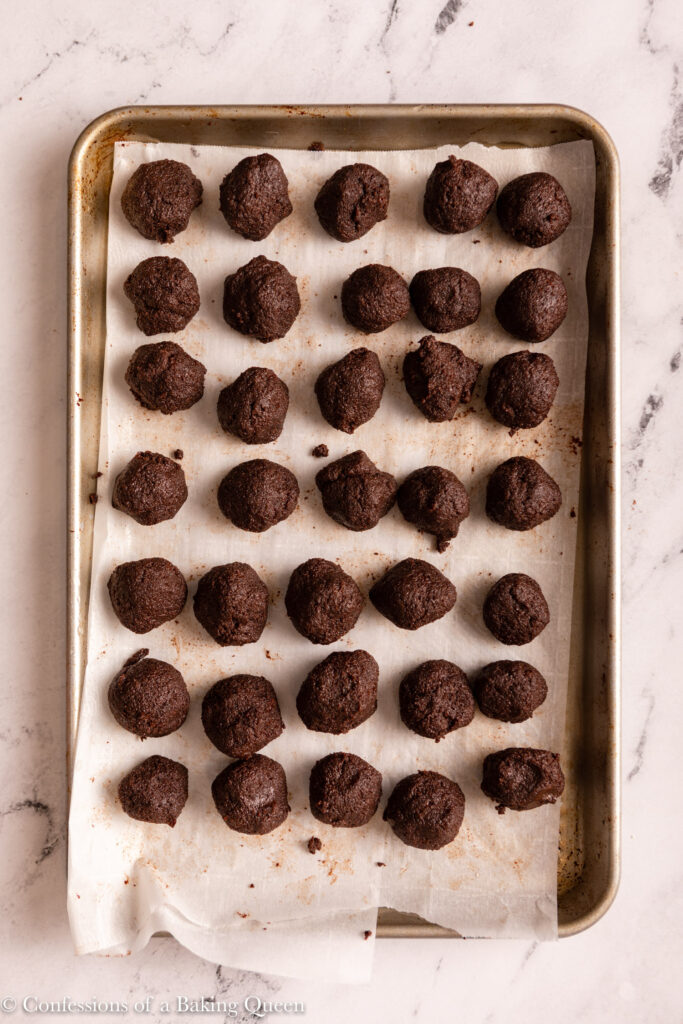
Line a sheet pan with wax paper and set it aside. Use a tablespoon scoop to portion out the batter into cake balls. You can also use a small cookie scoop in the size of one tablespoon, which makes it easier and quicker.
I gently roll them into a ball place the balls on the wax-lined sheet pan, ensuring no balls are touching, then freeze them for 20-30 minutes. Then I re-roll the balls as I find the colder balls are easier to roll into a true circular shape. Then place them back in the freezer for another 30 minutes to an hour, dipping the cake balls is much easier with truly cold pop.
While the cake balls are freezing prepare the drying area, you can either take a cardboard box and use a knife to poke individual holes about 2-3 inches apart. Or take a few glasses and fill them with dried rice or dried beans, set aside until needed.
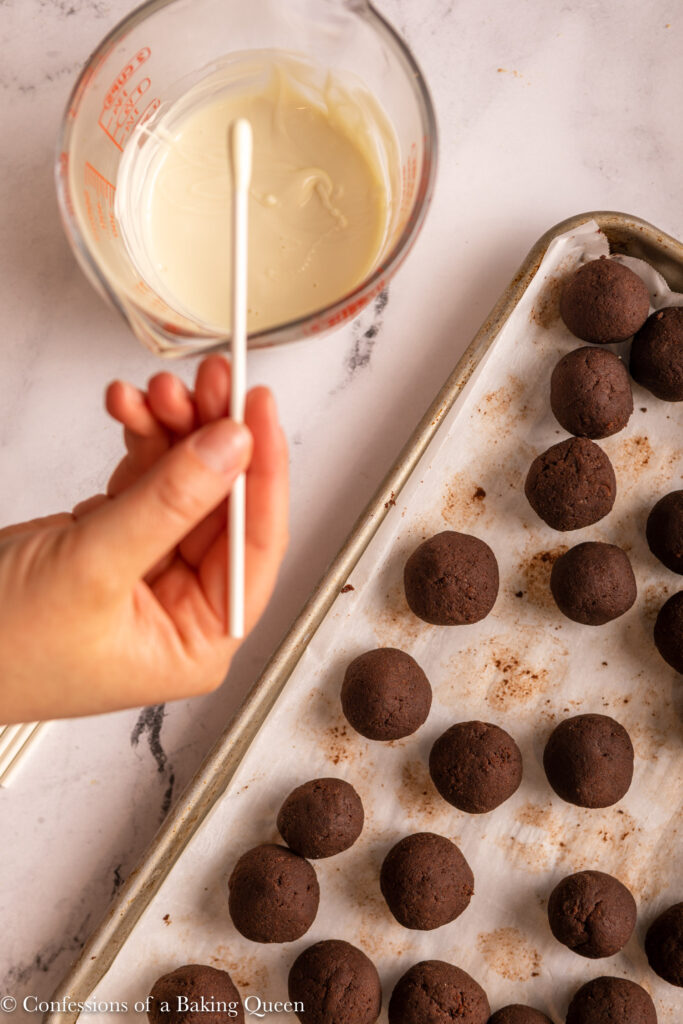
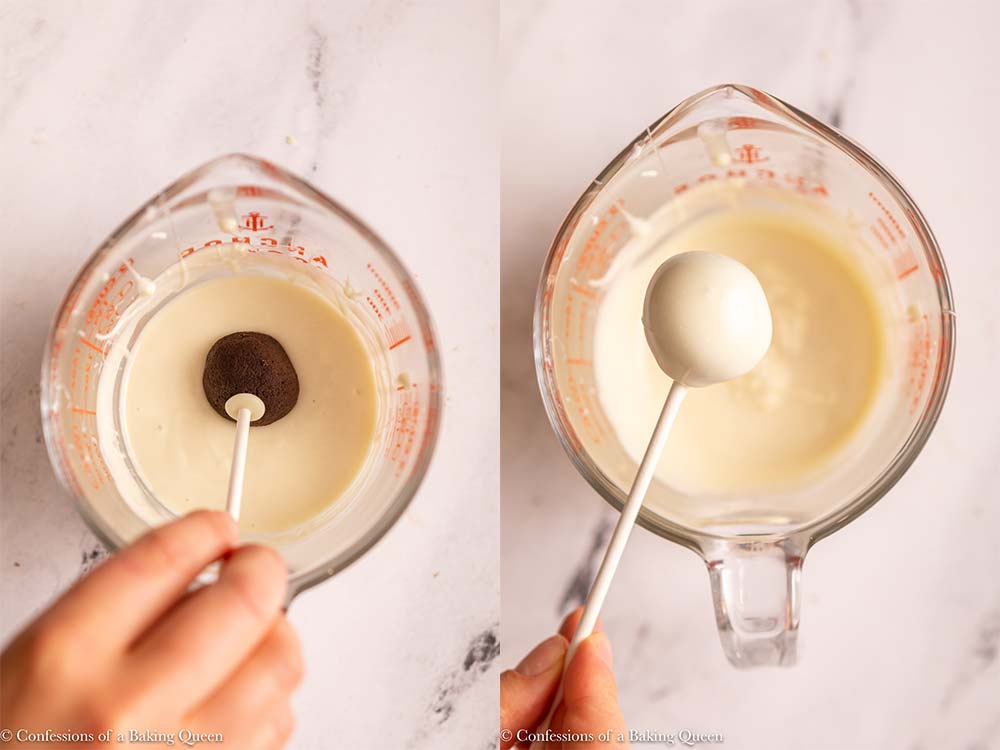
Once the cake pops are almost done chilling melt the chocolate and pour into a thinner and deeper bowl as opposed to a shallow one. Take a candy stick and dip it lightly into the chocolate then poke it into a cake ball, this helps ensure the cake ball sticks to the candy pop.
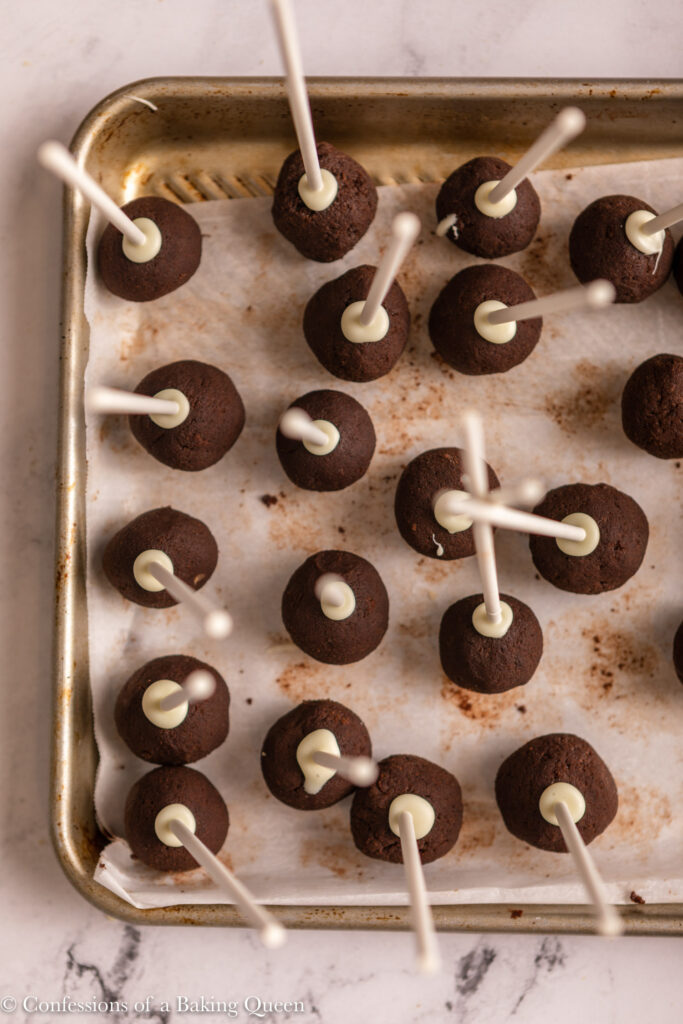
Place the tray of cake pops back into the freezer for 10 minutes then pull out 3 or 4 at a time as you dip them. Dipping the cake pops is easier when they are cold so it's best to do them in small batches. Dip into the chocolate to ensure the whole cake pop is covered then tap the stick on the side of the bowl a couple of times to let the excess chocolate drip off.
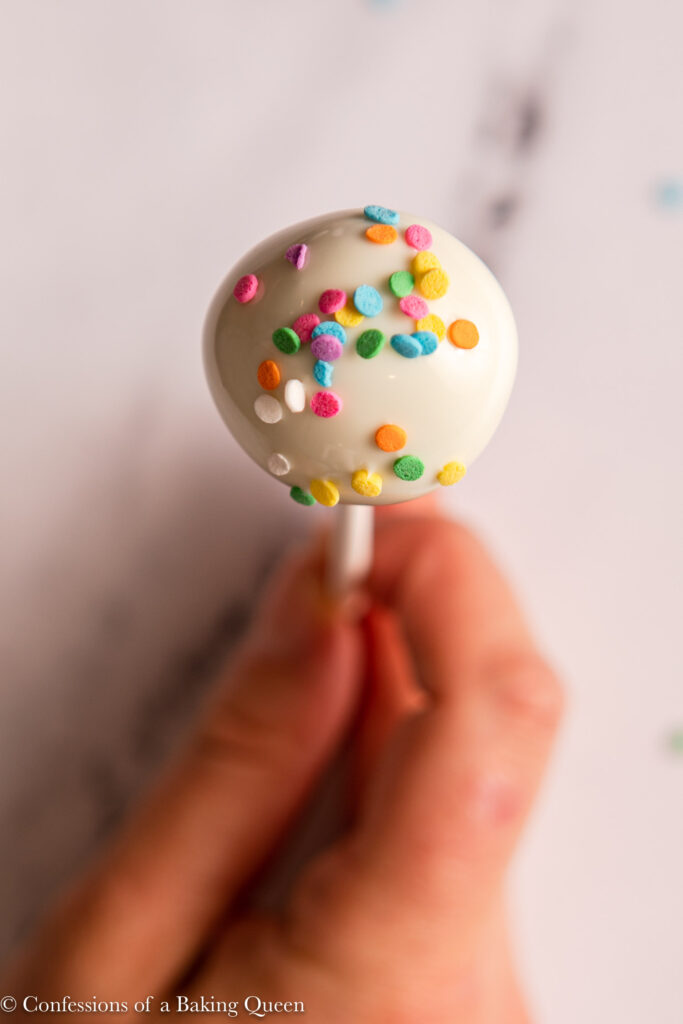
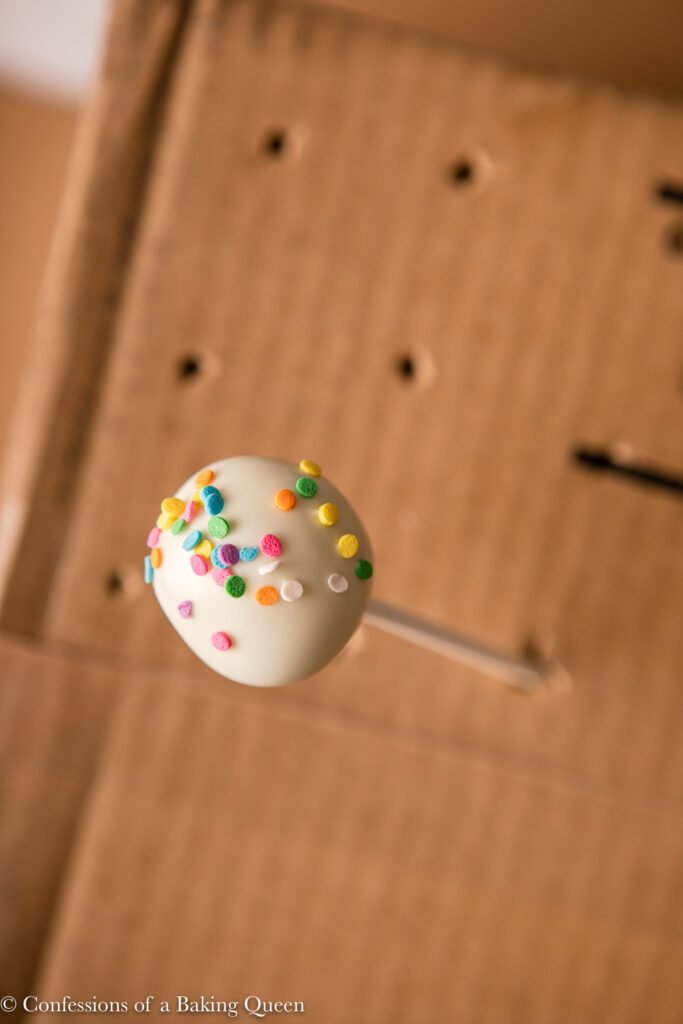
To decorate cake pops remove the cake pop from the chocolate area preferably over a sheet pan or plate and add desired sprinkles directly after dipping. Adding sprinkles over a sheet pan makes clean up a bit easier if all of the sprinkles are confined to the plate.
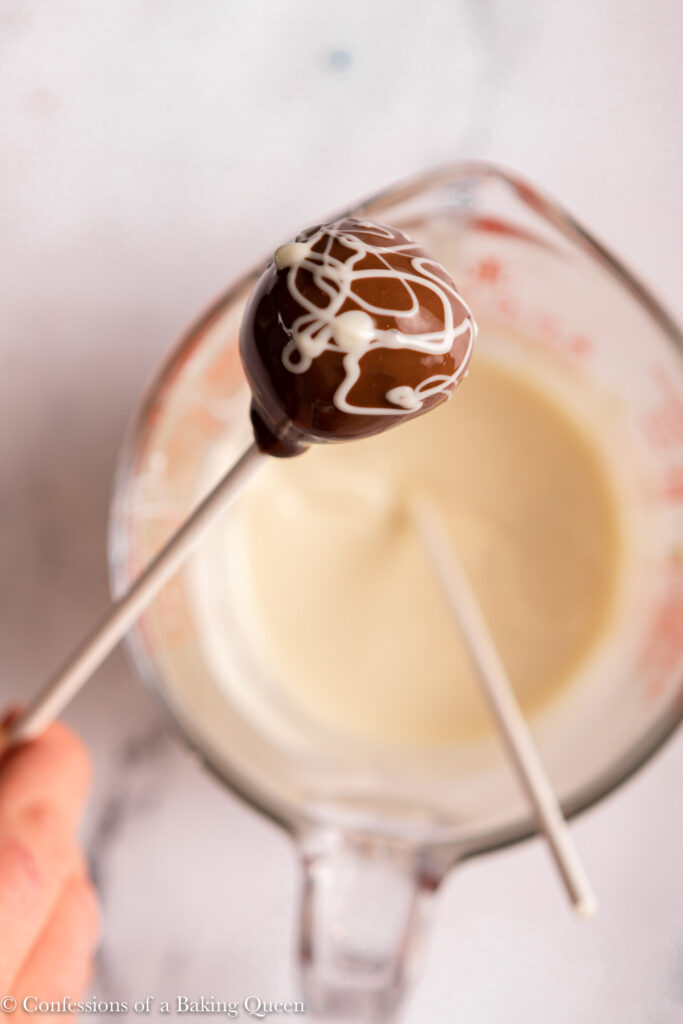
You could also use another chocolate and drizzle on top for a pretty design.
Place the cake pop in the drying area for at least 45 minutes to an hour to fully set. Store cake pops in an air-tight container in a cool place for up to 5 days. I live in a warm environment so I store my cake pops in the fridge then let them thaw for 10-15 minutes at room temperature before serving.
How to freeze
To freeze the cake balls do not dip them in the chocolate. Once the balls are rolled into balls place them on the sheet tray and freeze until solid. Once solid transfer to a freezer safe container.
When ready to use the cake balls thaw in the fridge for an hour or two before dipping.
Making ahead of time
If you are making these a day or two in advance for a party or something then I would suggest candy melts since they have stabilizers in them compared to just regular chocolate could melt or schmear easier.
Undipped cake balls can be stored in the fridge for up to 4 days before dipping and enjoying.
Can you double
You can easily double the recipe and make more cake pos. Just make sure you have enough room in your freezer and you take your time dipping the balls.
Bite size dessert recipes
Brownie Bites are the perfect treat, we love these in our house!
Peanut butter balls are delicious all year long, not just at Christmas time!
Mini Oreo Cheesecakes make any party ten times better!
★★★★★ Please let me know if you make this recipe by leaving a star rating and comment below!
Make sure to join our Newsletter and follow us on Pinterest, Instagram, Facebook, & Twitter.
PrintRecipe Card
How to Make Cake Pops
This easy recipe teaches you how to make cake pops. A perfect party dessert, everyone loves these individual cake balls! This cake pops recipe is customizable and easy for beginners!
- Total Time: 1 hour 30 minutes
- Yield: 35-40 Cake Pops 1x
Ingredients
- 1-8" or 9" Baked Cake or ½ Box Cake Mix, prepared according to the directions
- ½ Batch of Chocolate Buttercream Frosting or Vanilla Buttercream or ½- 1 Cup Frosting
- 20-30oz Chocolate Melting Wafers, Candy Melts, or Tempered Melted Chocolate
- Various Sprinkles
- Gel- Food Coloring for Colored Chocolate, if desired
Instructions
- Your cake must be baked and completely cooled before proceeding. Once your cake has cooled in a large bowl crumble the cake into crumbs. You wanted small crumbs, no large chunks of the cake should be left. Some people like to cut the edges of the cake off to prevent any thicker clumps of cake, I personally don't have a problem with it.
- Add half of the frosting required and mix together, then add a bit more frosting at a time until you are able to grab a chunk of the batter and press it together and it holds itself together easily. The trick is to not over-wet the cake with too much frosting, then you will just have a sloppy, mushy mess that will not hold a ball shape. You do want a very moist mixture though!
- Line a sheet pan with wax paper and set it aside. Use a tablespoon scoop to portion out the batter into cake balls. I gently roll them into a ball place the balls on the wax-lined sheet pan, ensuring no balls are touching, then freeze them for 20-30 minutes. Then I re-roll the balls as I find the colder balls are easier to roll into a true circular shape. Then place them back in the freezer for another 30 minutes to an hour, dipping the cake balls is much easier with a truly cold pop.
- While the cake balls are freezing prepare the drying area, you can either take a cardboard box and use a knife to poke individual holes about 2-3 inches apart. Or take a few glasses and fill them with dried rice or dried beans, set aside until needed.
- Once the cake pops are almost done chilling melt the chocolate and pour into a thinner and deeper bowl as opposed to a wider, shallow one. Take a candy stick and dip it lightly into the chocolate then poke it into a cake ball, this helps ensure the cake ball sticks to the candy pop.
- Place the tray of cake pops back into the freezer for 10 minutes then pull out 3 or 4 at a time as you dip them. The cake pops are easier to dip when cold so it's best to do them in small batches. Dip into the chocolate to ensure the whole cake pop is covered then tap the stick on the side of the bowl a couple of times to let the chocolate drip off.
- Remove the cake pop from the chocolate area and add desired sprinkles. Place the cake pop in the drying area for at least 45 minutes to an hour to fully set. Store cake pops in an air-tight container in a cool place for up to 5 days. I live in a warm environment so I store my cake pops in the fridge then let them thaw for 10-15 minutes before serving.
Equipment
 Buy Now →
  Buy Now →
Ghirardelli Dark Chocolate Melting Wafers
Buy Now →
Ghirardelli, Candy Making & Dipping, White Melting Wafers
Buy Now → Buy Now →
  Buy Now →
 - Prep Time: 1 Hour 30 Minutes
- Category: Dessert
- Method: Dipping
- Cuisine: American

Tara says
These are a great summer activity to do with kids, mine were kept busy doing this for a few hours because they LOVE decorating
Elizabeth Waterson says
Thank you so much for the lovely review Tara, so glad you enjoyed the recipe with your kids! XX Liz