Ingredients
Scale
- 1-8" or 9" Baked Cake or 1/2 Box Cake Mix, prepared according to the directions
- 1/2 Batch of Chocolate Buttercream Frosting or Vanilla Buttercream or 1/2- 1 Cup Frosting
- 20-30oz Chocolate Melting Wafers, Candy Melts, or Tempered Melted Chocolate
- Various Sprinkles
- Gel- Food Coloring for Colored Chocolate, if desired
Instructions
- Your cake must be baked and completely cooled before proceeding. Once your cake has cooled in a large bowl crumble the cake into crumbs. You wanted small crumbs, no large chunks of the cake should be left. Some people like to cut the edges of the cake off to prevent any thicker clumps of cake, I personally don't have a problem with it.
- Add half of the frosting required and mix together, then add a bit more frosting at a time until you are able to grab a chunk of the batter and press it together and it holds itself together easily. The trick is to not over-wet the cake with too much frosting, then you will just have a sloppy, mushy mess that will not hold a ball shape. You do want a very moist mixture though!
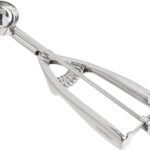
- Line a sheet pan with wax paper and set it aside. Use a tablespoon scoop to portion out the batter into cake balls. I gently roll them into a ball place the balls on the wax-lined sheet pan, ensuring no balls are touching, then freeze them for 20-30 minutes. Then I re-roll the balls as I find the colder balls are easier to roll into a true circular shape. Then place them back in the freezer for another 30 minutes to an hour, dipping the cake balls is much easier with a truly cold pop.
- While the cake balls are freezing prepare the drying area, you can either take a cardboard box and use a knife to poke individual holes about 2-3 inches apart. Or take a few glasses and fill them with dried rice or dried beans, set aside until needed.
- Once the cake pops are almost done chilling melt the chocolate and pour into a thinner and deeper bowl as opposed to a wider, shallow one. Take a candy stick and dip it lightly into the chocolate then poke it into a cake ball, this helps ensure the cake ball sticks to the candy pop.
- Place the tray of cake pops back into the freezer for 10 minutes then pull out 3 or 4 at a time as you dip them. The cake pops are easier to dip when cold so it's best to do them in small batches. Dip into the chocolate to ensure the whole cake pop is covered then tap the stick on the side of the bowl a couple of times to let the chocolate drip off.
- Remove the cake pop from the chocolate area and add desired sprinkles. Place the cake pop in the drying area for at least 45 minutes to an hour to fully set. Store cake pops in an air-tight container in a cool place for up to 5 days. I live in a warm environment so I store my cake pops in the fridge then let them thaw for 10-15 minutes before serving.
Equipment

Ghirardelli, Candy Making & Dipping, White Melting Wafers
Buy Now →
Ghirardelli Dark Chocolate Melting Wafers
Buy Now → Buy Now →
  Buy Now →
  Buy Now →
  Buy Now →
 - Prep Time: 1 Hour 30 Minutes
- Category: Dessert
- Method: Dipping
- Cuisine: American
