
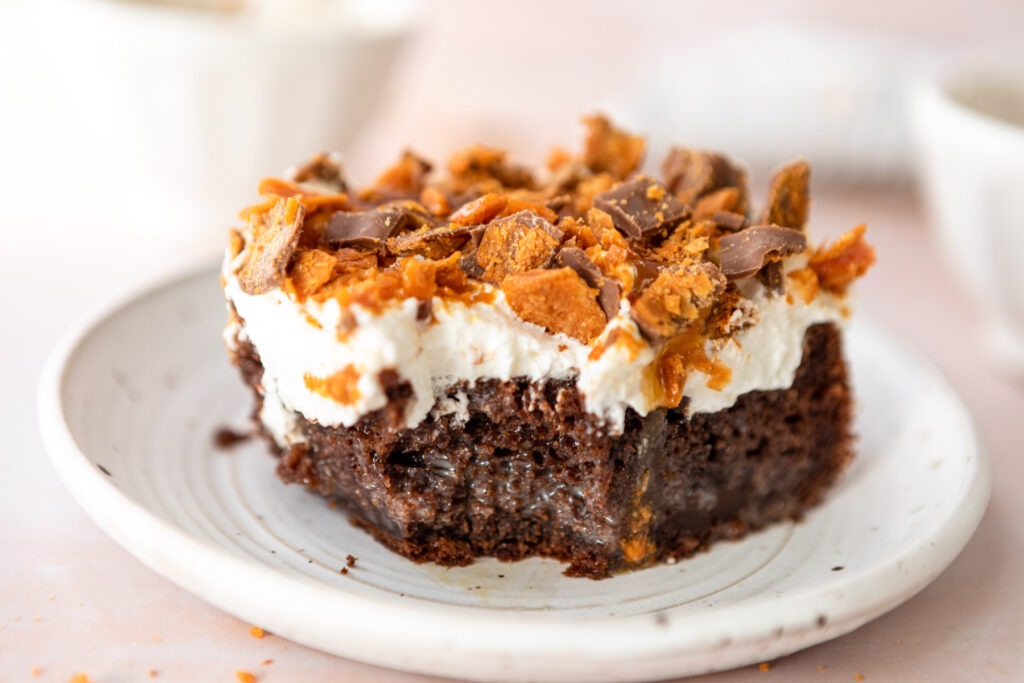
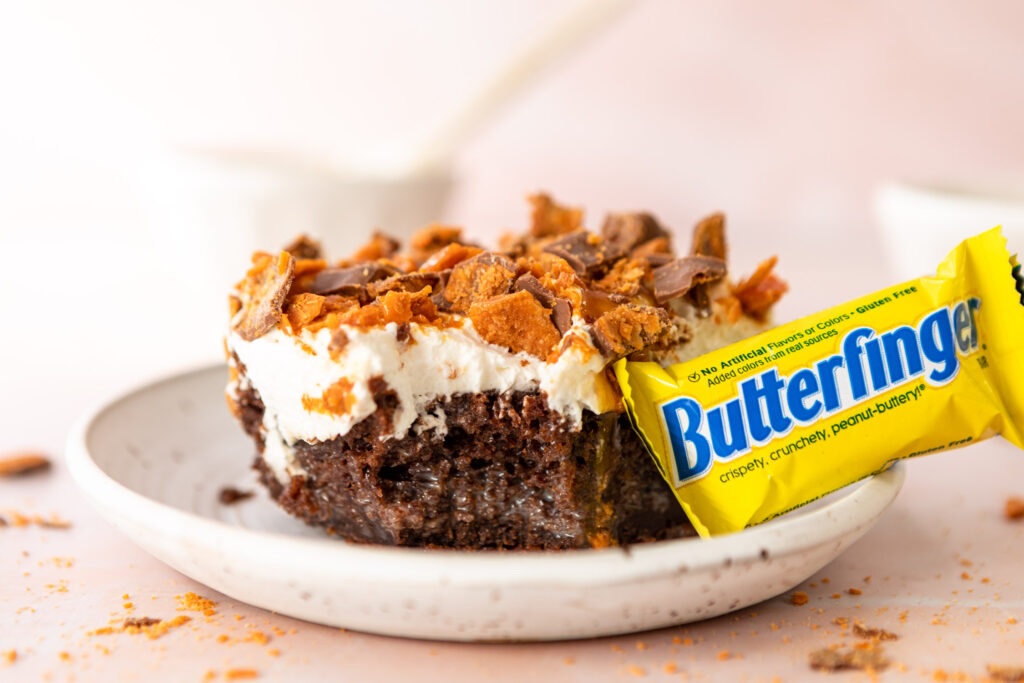
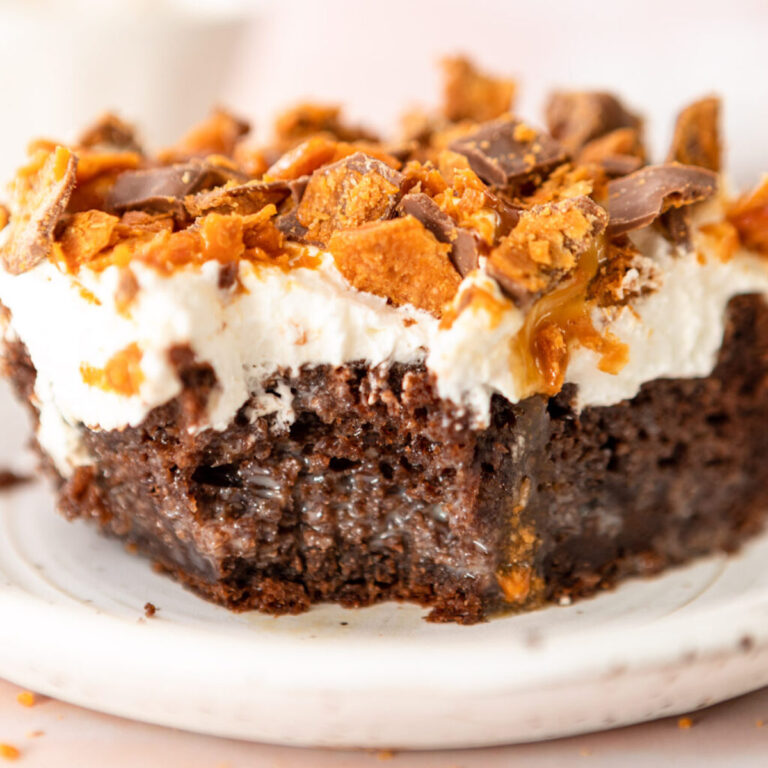
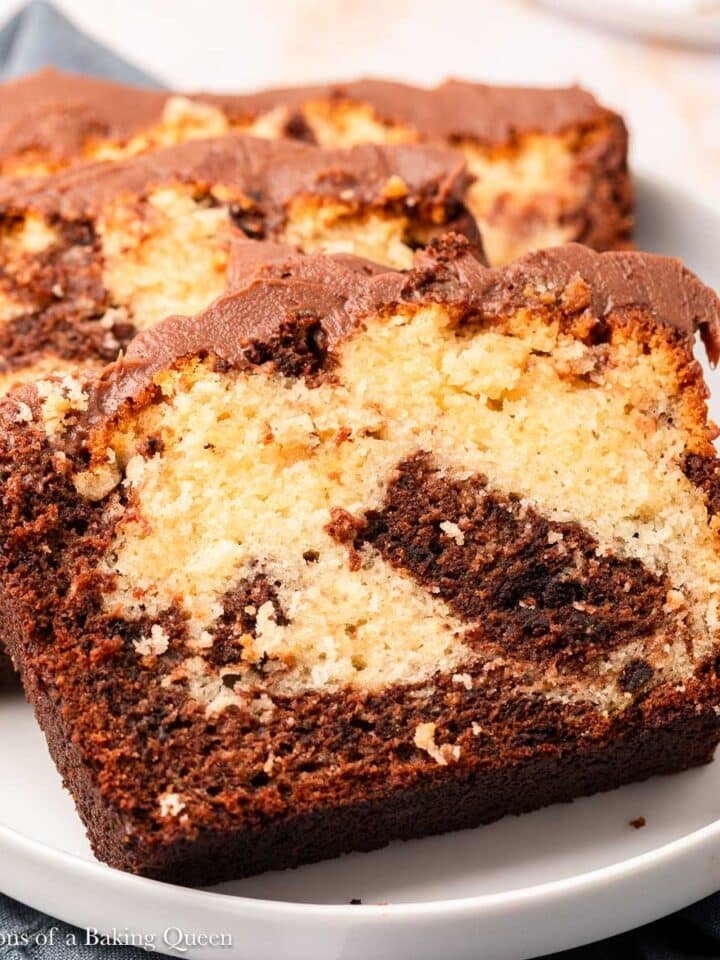
This Butterfinger cake is an easy chocolate poke cake filled with a rich caramel and sweetened condensed milk mixture that soaks into every bite. After baking, the warm cake is poked all over so the gooey caramel filling can seep into the sponge, creating an incredibly moist texture. The chilled cake is finished with fluffy whipped cream and plenty of chopped Butterfinger candy for a crunchy peanut-butter-and-chocolate topping that makes this dessert a guaranteed crowd-pleaser.

Here we are with another beautiful cake recipe. As we head into the summer time, I love cold cakes and cakes I can prep ahead of time. This Butterfinger cake checks both those boxes and its topped with crushed Butterfinger so really what's not to love?
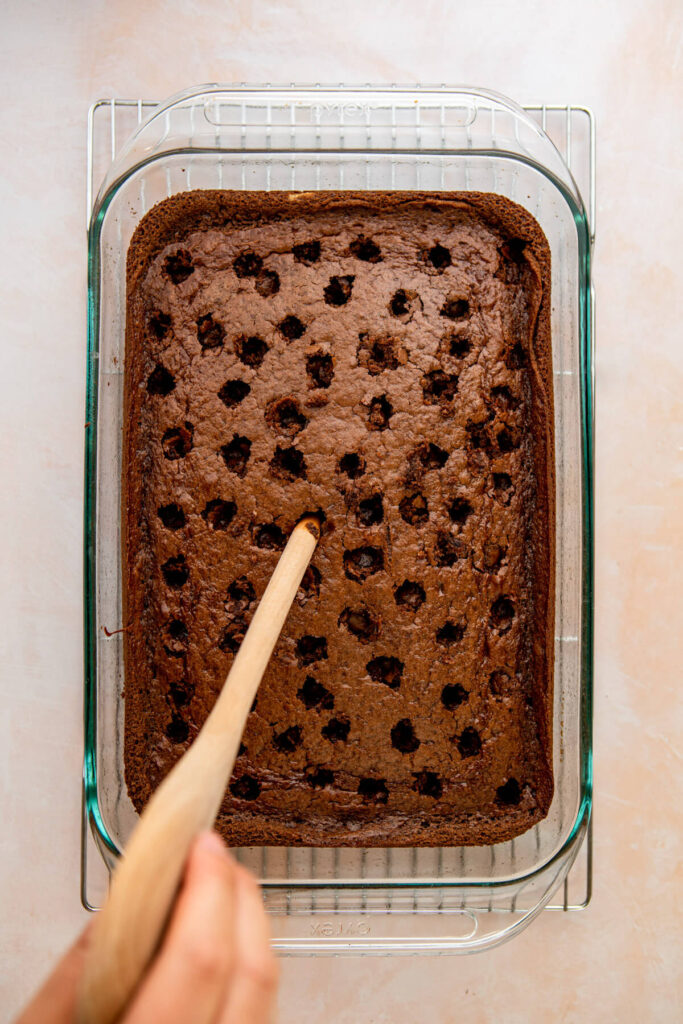
This recipe is for a poke style cake. So, we poke the cake with big holes all over then fill it with a gorgeous caramel and sweetened condensed milk filling. It creates a super moist cake you will adore. Very similar to the ever so popular Better Than Sex Poke Cake!
If you enjoy fun candy-inspired desserts like this one, you might also love recipes such as Oreo cheesecake, Peanut Butter Pie, or M&M Brownies. These desserts combine chocolate flavors in rich, indulgent ways that make them perfect for parties and celebrations.
My niece and nephew loved the idea of cake topped with candy? Dreams do come true! In my house we love Butterfinger. I love the crispety, crunchety texture that is delicious in recipes and baking.
The Ingredients That Make This Cake So Fun
Technically you could just bake a boxed cake mix as is but I find adding a little extra to it makes all the difference. For the cake you'll need:
- Devil's food cake mix: The chocolate base for the cake, enriched with extra ingredients like sour cream for a moist texture.
- Sour cream: Adds richness and helps create a softer crumb in the cake.
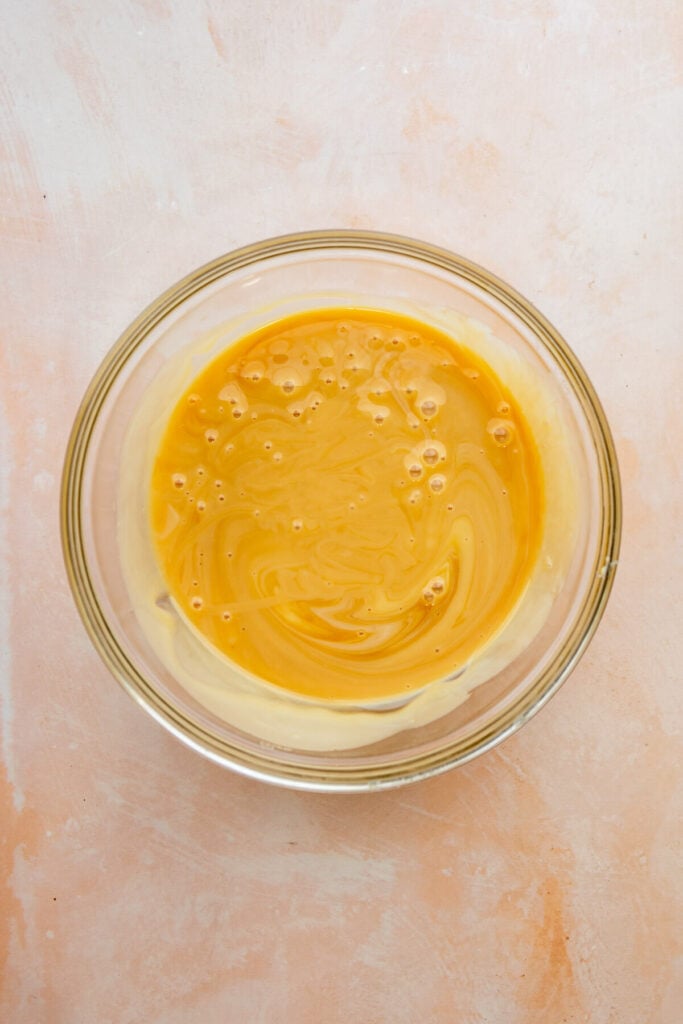
- Caramel + sweetened condensed milk: Poured into the poked cake so the filling seeps into the sponge, making the cake extra moist and sweet.
- Whipped cream topping: Light and fluffy, balancing the sweetness of the caramel and candy topping.
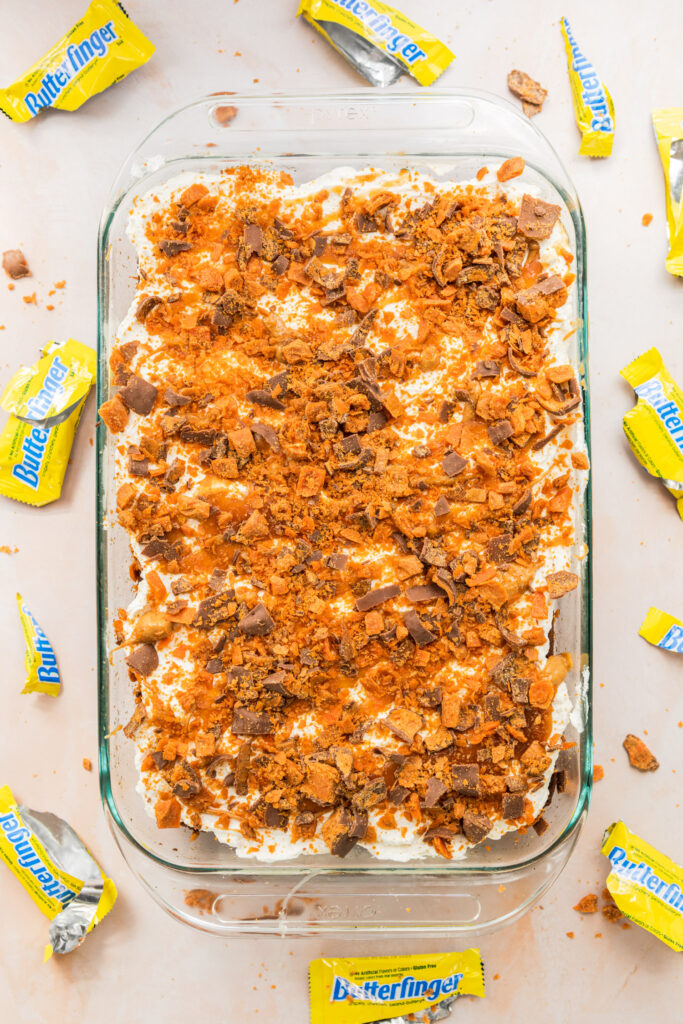
- Butterfinger candy bars: Chopped and sprinkled over the cake for crunchy peanut butter flavor.
Let's Make a Candy-Loaded Cake
This recipe is super easy as we just use a doctored up cake mix to prepare the cake.


The cake is best on day one or two but good for up to 3 days, the candies will lose some of their crunch the longer the cake sits, so you could prepare the cake and add the chopped candy at the last minute to preserve crunch.
There you have it, my Butterfinger Poke Cake recipe! I hope you love it.
★★★★★ Please let me know if you make this recipe by leaving a star rating and comment below!
Make sure to join our Newsletter and follow us on Pinterest, Instagram, Facebook, & Twitter.
PrintRecipe Card
Butterfinger Cake with Caramel & Whipped Cream
This Butterfinger cake is an easy chocolate poke cake filled with a rich caramel and sweetened condensed milk mixture that soaks into every bite. After baking, the warm cake is poked all over so the gooey caramel filling can seep into the sponge, creating an incredibly moist texture. The chilled cake is finished with fluffy whipped cream and plenty of chopped Butterfinger candy for a crunchy peanut-butter-and-chocolate topping that makes this dessert a guaranteed crowd-pleaser.
- Total Time: 2 Hours 45 Minutes
- Yield: 15 Slices 1x
Ingredients
Chocolate Cake
- 1 Box Devils Food Cake
- 4 Large Eggs, at room temp.
- 8oz (1 Cup) Milk
- 4oz (½ Cup) Vegetable Oil
- 4oz (½ Cup) Sour Cream
Filling
- 6oz Caramel (store-bought or homemade)
- 14oz Sweetened Condensed Milk
Topping
- 16oz (2 Cups) Heavy Whipping Cream
- 3 Tablespoons Powdered Sugar
- 6 Butterfinger® Fun Size
- 2 Tablespoons Melted Peanut Butter for drizzling if desired
- 2 Tablespoons Caramel for drizzling if desired
Instructions
Chocolate Cake
- Preheat oven to 350F/180C and heavily grease a 9X13 baking dish, set aside.
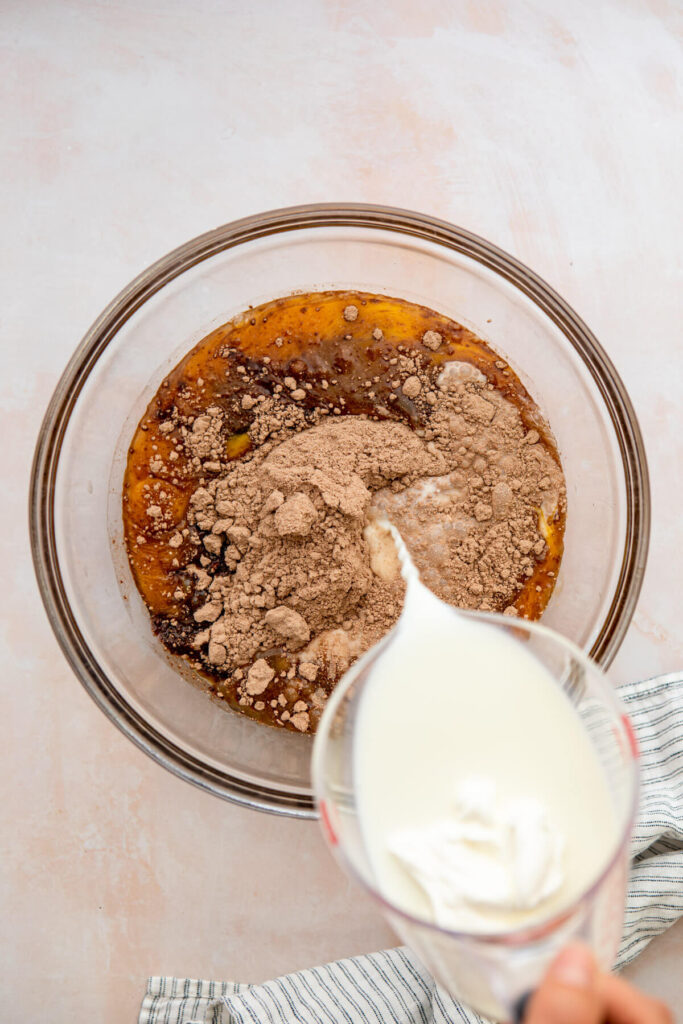
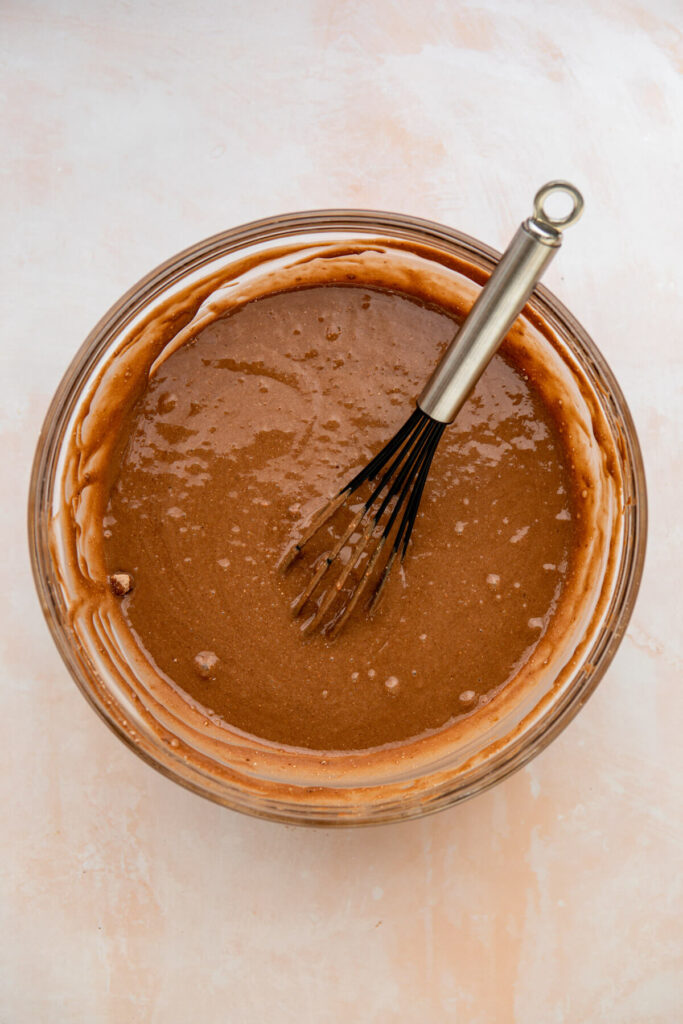
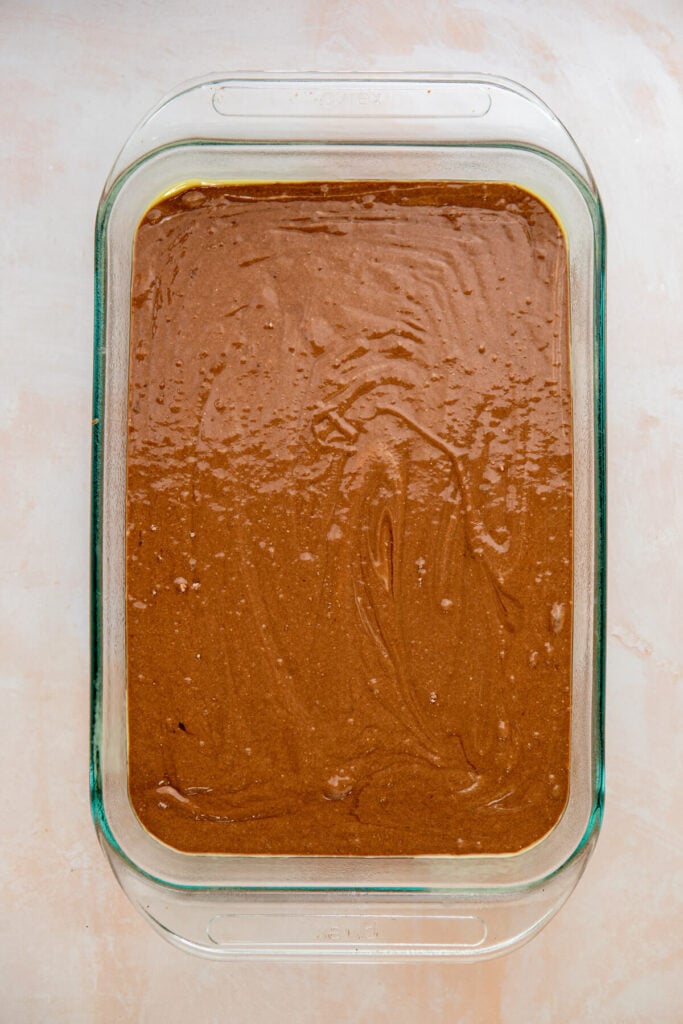
- In a large bowl, mix together all cake ingredients, just until combined, making sure to scrape the bottom of the bowl so no flour streaks remain.
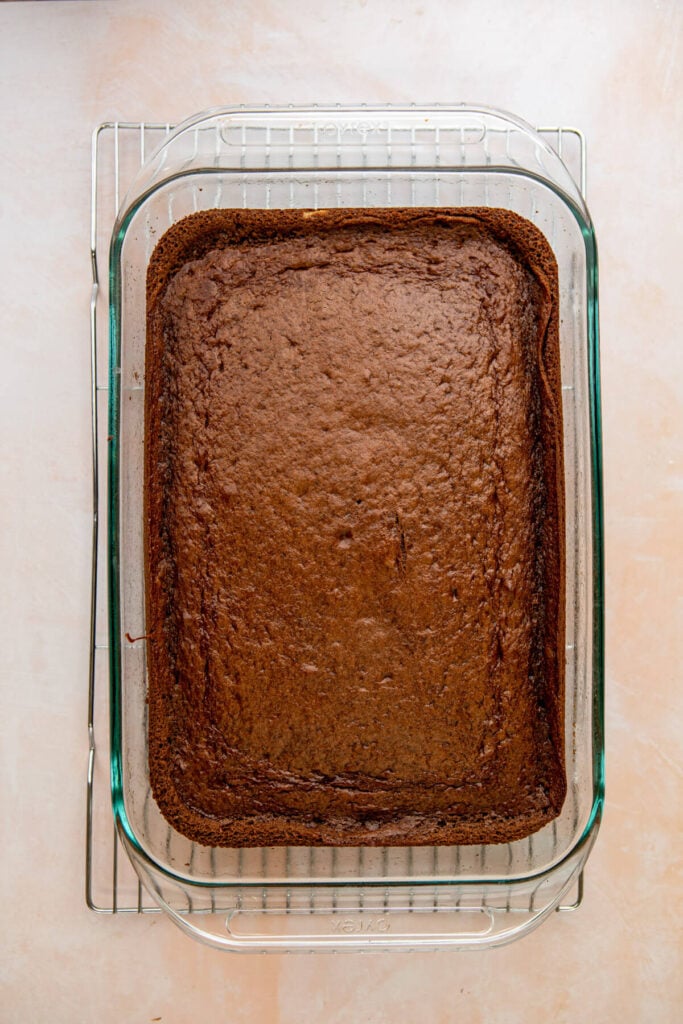
- Pour into prepared dish and bake for 28-33 minutes, or until the cake is done. You can check if it's done by lightly pressing the top center of the sponge, if it springs back it's done, or use a toothpick inserted in the center to check for no wet batter.
Filling
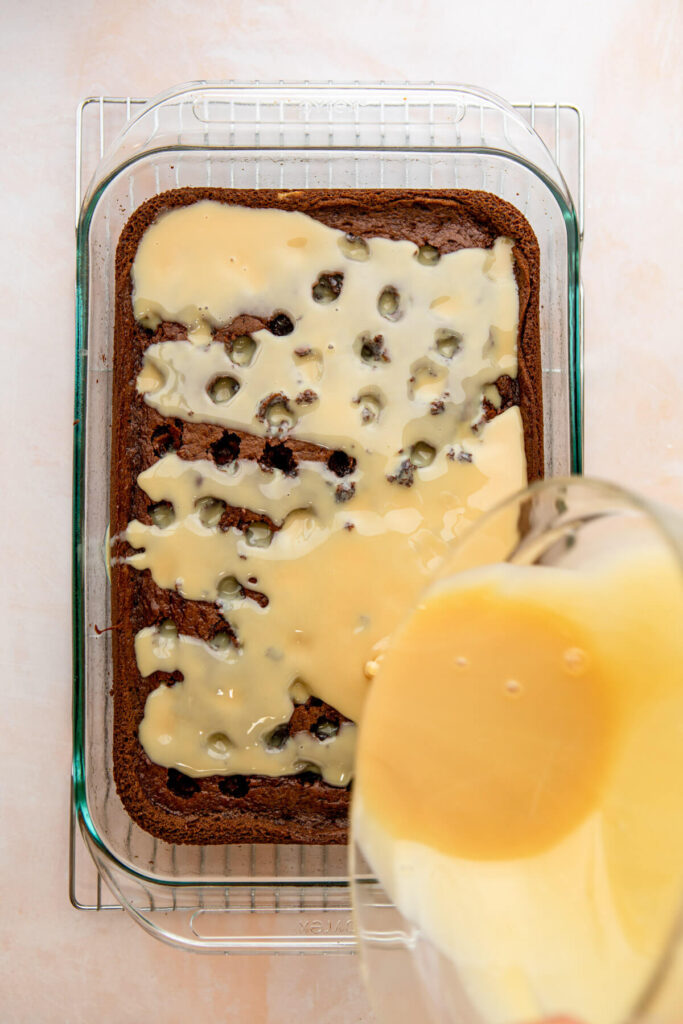
- As soon as the cake is out of the oven use the bottom of a wooden spoon to poke holes into the cake.
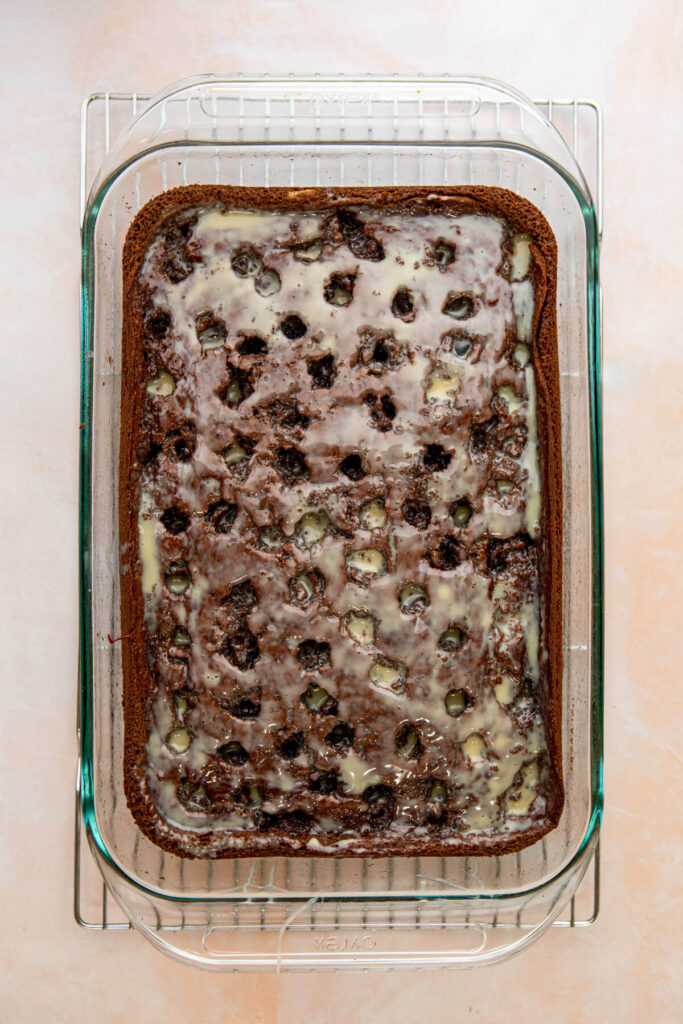
- In a large bowl, mix together the caramel and sweetened condensed milk. Evenly pour caramel mixture over the cake into the holes. Let the cake cool for 1 hour, then chill the cake in the fridge for 1 hour before preparing the topping.
Topping
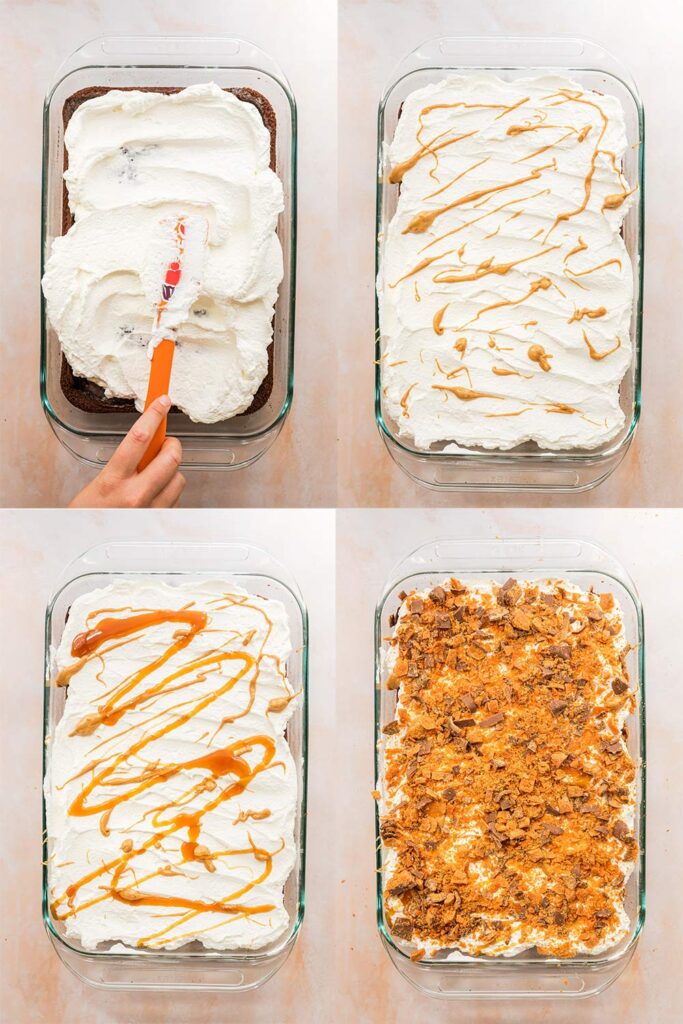
- In a large bowl with a handheld electric mixer or the bowl of an electric stand mixer fitted with a whisk attachment beat the heavy cream, powdered sugar until medium-stiff peaks form.
- Using an offset spatula spread whipped cream over the chilled cake.
- Chop Butterfinger Fun Size bars into small/ medium chunks.
- Drizzle peanut butter and caramel on top of whipped cream. Sprinkle chunks of Butterfinger on top. Cover cake with plastic wrap and store in the refrigerator. The cake is best on day one or two, but good for up to 3 days, the candies will lose some of their crunch the longer the cake sits, so you could prepare the cake and add the chopped candy at the last minute to preserve crunch.


- Prep Time: 15
- Cook Time: 30
- Category: Dessert
- Method: Bake
- Cuisine: American

Martha Greene says
I am making this cake now and the directions call for mixing milk powder in with the powdered sugar and the heavy cream. I can’t find where it tells how much milk powder to put in. Could you help me out a little please?
Elizabeth Waterson says
Hi Martha, so sorry for the confusion. In recipes where I need the whipped cream to hold shape I add milk powder but in this recipe its not necessary! So if you used it or didnt use it, it wont make a difference! Please let me know how you liked the cake! XX Liz